Contents
- 1 Why This Guide Matters (Read This First)
- 2 What is WPBot?
- 3 What makes WPBot “smart”?
- 4 What Can You Build with WPBot?
- 5 Step-by-Step: Build Your Smart AI Chatbot
- 5.1 Step 1: Install WPBot
- 5.2 Step 2: Basic Setup (Don’t Skip This)
- 5.3 Step 3: Train Your Chatbot (Core Step)
- 5.4 Step 4: Add AI (This Changes Everything)
- 5.5 Step 5: Create Conversational Flows
- 5.6 Step 6: Enable WooCommerce Integration (If You Sell Products)
- 5.7 Step 7: Lead Generation Setup
- 5.8 Step 8: Add Human Handoff (Critical)
- 5.9 Step 9: Customize Design (Make It Match Your Brand)
- 5.10 Step 10: Test Everything (Don’t Skip This)
- 5.11 Step 11: Optimize for Conversions
- 5.12 Step 12: Track Performance
- 6 Advanced Features (For Power Users)
- 7 WPBot vs Traditional Chatbots
- 8 Common Mistakes (Avoid These)
- 9 Real-World Example (Simple)
- 10 FAQs
- 11 Final Thoughts (Don’t Overthink This)
- 12 Quick Recap (Save This)
You can build a smart AI chatbot on your WordPress site using WPBot in under a few hours—without coding. Install the plugin, train it with your content, connect AI (like OpenAI), automate responses, and optimize for conversions. This guide walks you through every step in a simple, practical way.
Why This Guide Matters (Read This First)
If you run a WordPress site, you’re probably dealing with:
- Repeating the same customer questions
- Losing leads when you’re offline
- High cart abandonment (especially on WooCommerce)
- Slow support response times
A smart AI chatbot solves all of that.
And the best part?
You don’t need to be a developer.
What is WPBot?
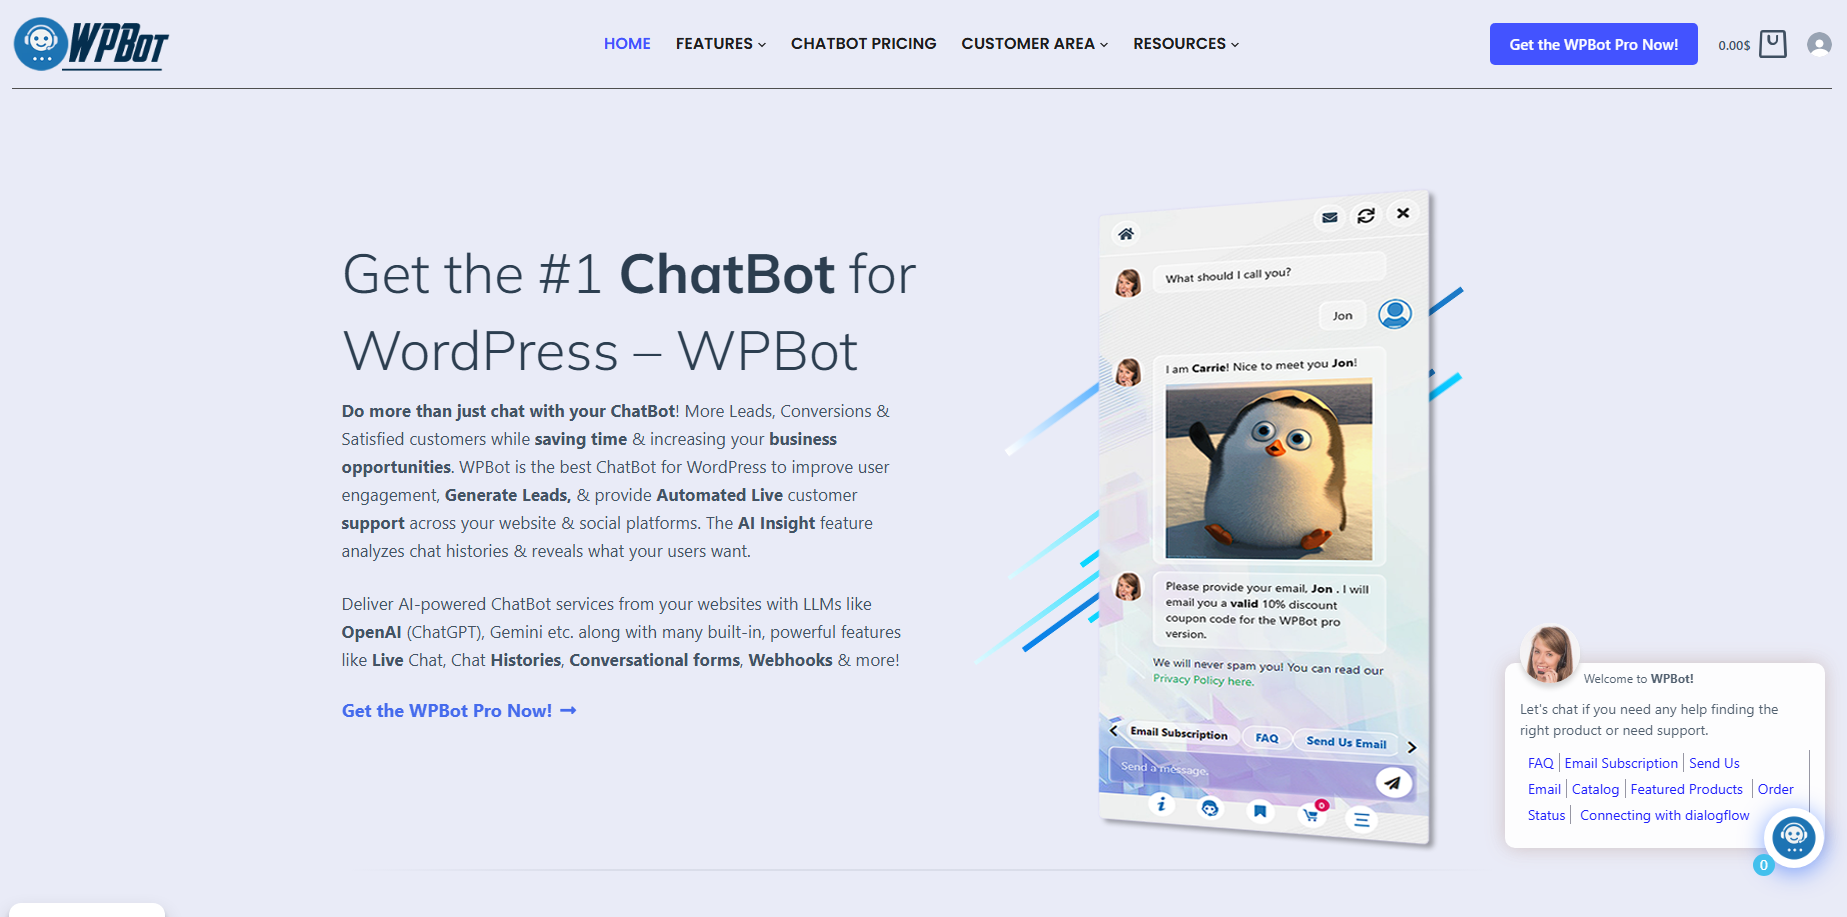 WPBot is a no-code AI chatbot plugin for WordPress.
It helps you:
- Answer customer queries automatically
- Capture leads 24/7
- Guide visitors to the right pages
- Increase sales and engagement
Think of it as a smart assistant sitting on your website.
What makes WPBot “smart”?
WPBot becomes powerful when you connect it with AI.
It can:
- Understand natural language
- Learn from your website content
- Provide personalized responses
- Automate conversations
What Can You Build with WPBot?
Before we jump into steps, let’s look at real use cases.
Common Use Cases
You can build:
- Customer support chatbot
- WooCommerce sales assistant
- Lead generation bot
- FAQ automation bot
- Booking assistant
- Knowledge base chatbot
Example Scenario
Imagine this:
A visitor asks:
👉 “Do you offer refunds?”
Instead of waiting for you, WPBot instantly replies using your policy page.
That’s automation + AI working together.
Step-by-Step: Build Your Smart AI Chatbot
Let’s break it down into simple steps.
Step 1: Install WPBot
How to install WPBot?
Follow this:
- Go to your WordPress dashboard
- Click Plugins → Add New
- Search for WPBot
- Click Install
- Click Activate
Pro Tip
Start with the free version.
Upgrade later if you need:
- AI integrations
- Advanced automation
- WooCommerce features
Step 2: Basic Setup (Don’t Skip This)
What should you configure first?
After activation:
Go to: WPBot → Settings
Set:
- Chatbot name
- Welcome message
- Language
- Appearance (color, position)
Example Welcome Message
Instead of boring text:
❌ “Hello”
✅ “Hey 👋 Need help finding something fast?”
Make it human.
Step 3: Train Your Chatbot (Core Step)
How does WPBot learn?
WPBot uses:
- Your website content
- FAQ entries
- Manual responses
Method 1: Use Website Content
WPBot can scan:
- Pages
- Blog posts
- Product descriptions
This allows it to answer real questions.
Method 2: Add FAQs
Go to:
WPBot → FAQ
Add:
- Question
- Answer
Example
Q: What is your delivery time?
A: We deliver within 3–5 business days.
Why this matters
This is your chatbot’s “brain.”
The better your content → the smarter your bot.
Step 4: Add AI (This Changes Everything)
Why connect AI?
Without AI:
- Bot gives fixed responses
With AI:
- Bot understands intent
- Handles complex queries
- Feels human-like
How to connect AI?
- Get API key (e.g., OpenAI)
- Go to WPBot AI settings
- Paste API key
- Enable AI responses
What AI enables
- Natural conversations
- Context awareness
- Smarter replies
Important Tip
Control AI behavior.
Set:
- Response limits
- Tone (friendly, professional)
- Fallback answers
Step 5: Create Conversational Flows
What are conversational flows?
These are guided chat paths.
Example:
User → “I want to buy shoes”
Bot → “Men or Women?”
User → “Men”
Bot → Shows products
How to build flows?
Use WPBot’s flow builder:
- Define triggers
- Add responses
- Add buttons/options
Best Practices
Keep it simple:
- Ask one question at a time
- Use buttons instead of text input
- Guide users clearly
Step 6: Enable WooCommerce Integration (If You Sell Products)
What can WPBot do for eCommerce?
- Show products
- Track orders
- Recommend items
- Recover abandoned carts
Key Features
WPBot can:
- Search products instantly
- Answer product questions
- Suggest related items
Example
User: “Show me cheap headphones”
Bot: Displays filtered products
Step 7: Lead Generation Setup
How does WPBot capture leads?
It can ask:
- Name
- Phone number
When should it ask?
Trigger it:
- After 30 seconds
- After scroll
- Before exit
Example Flow
Bot: “Want a 10% discount?”
User: “Yes”
Bot: “Enter your email to get it.”
Why this works
You convert visitors into leads automatically.
Step 8: Add Human Handoff (Critical)
Why do you need this?
AI isn’t perfect.
Some queries need a human.
How to set it up?
WPBot allows:
- Live chat
- Email fallback
- Messenger integration
Example
Bot: “I’ll connect you with support.”
Step 9: Customize Design (Make It Match Your Brand)
What can you customize?
- Chat icon
- Colors
- Fonts
- Position
Why it matters
A chatbot should feel like part of your site—not a plugin.
Step 10: Test Everything (Don’t Skip This)
What should you test?
- Common questions
- Wrong inputs
- Edge cases
Checklist
Test these:
- FAQs working?
- AI responses relevant?
- Products showing correctly?
- Leads captured properly?
Step 11: Optimize for Conversions
How to improve results?
Focus on:
- Speed
- Relevance
- Clarity
High-Converting Tactics
Use these:
- Quick replies (buttons)
- Short messages
- Clear CTAs
- Urgency triggers
Example CTA
👉 “Get your discount now”
👉 “Find your product in 10 seconds”
Step 12: Track Performance
What should you measure?
- Conversations started
- Leads captured
- Conversion rate
- Drop-offs
Tools to use
- Google Analytics
- WPBot analytics
- Heatmaps
Advanced Features (For Power Users)
Want to go further?
Here’s what you can add:
AI Training with Custom Data
Upload:
- PDFs
- Docs
- Knowledge base
Multilingual Chatbot
Serve users in multiple languages.
Voice & WhatsApp Integration
Expand beyond your website.
WPBot vs Traditional Chatbots
|
Feature |
WPBot (AI) |
Traditional Bots |
|
Learning ability |
High |
Low |
|
Automation |
Advanced |
Basic |
|
Personalization |
Strong |
Limited |
|
Setup |
Easy |
Complex |
Common Mistakes (Avoid These)
Don’t do this
- ❌ Overcomplicating flows
- ❌ Ignoring FAQs
- ❌ Not testing responses
- ❌ Using long messages
- ❌ No human fallback
Real-World Example (Simple)
Scenario: Small eCommerce Store
Before WPBot:
- 70% abandoned carts
- Slow replies
After WPBot:
- Instant responses
- Product suggestions
- Email capture
Result:
👉 Higher conversions
👉 Better engagement
FAQs
What is WPBot used for?
WPBot is used to automate customer support, generate leads, and improve user engagement on WordPress websites.
Is WPBot free?
Yes, there is a free version. Advanced features require a premium plan.
Can WPBot work without AI?
Yes. But it will be limited to predefined responses.
Does WPBot work with WooCommerce?
Yes. It integrates deeply with WooCommerce for product search, recommendations, and order tracking.
How long does it take to set up?
Basic setup: 30–60 minutes
Advanced AI setup: 2–3 hours
Final Thoughts (Don’t Overthink This)
Building a smart chatbot is no longer hard.
You don’t need:
- Coding skills
- Big budget
- Technical team
You just need:
- Clear content
- Simple flows
- Smart AI integration
Quick Recap (Save This)
To build your WPBot chatbot:
- Install plugin
- Configure basics
- Add FAQs
- Connect AI
- Build flows
- Enable WooCommerce
- Capture leads
- Add human fallback
- Customize design
- Test and optimize