Make sure that you are logged into the Google/Gmail account that you want to use.
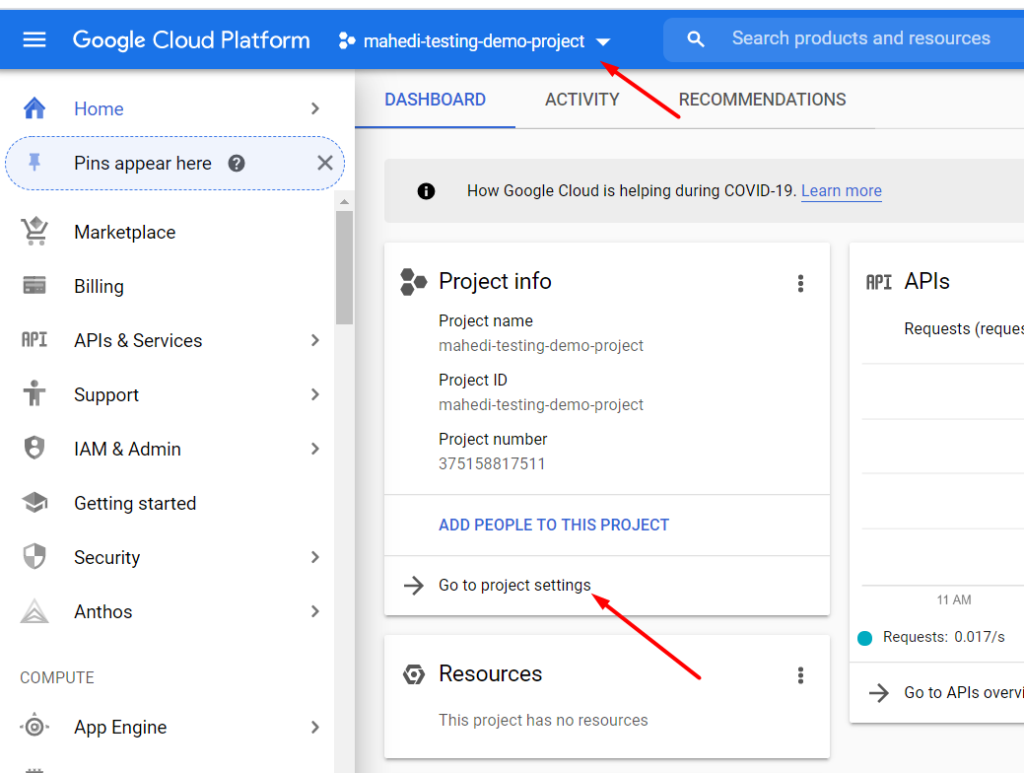
√ First of all, You need to create a google project. In order to create a project please go to the following URL and follow along with the screenshots and links below.
Link: https://console.cloud.google.com/home/dashboard
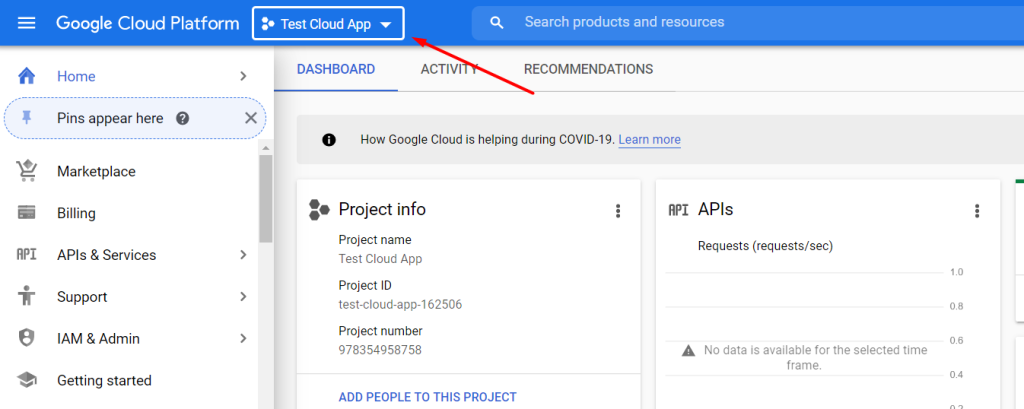
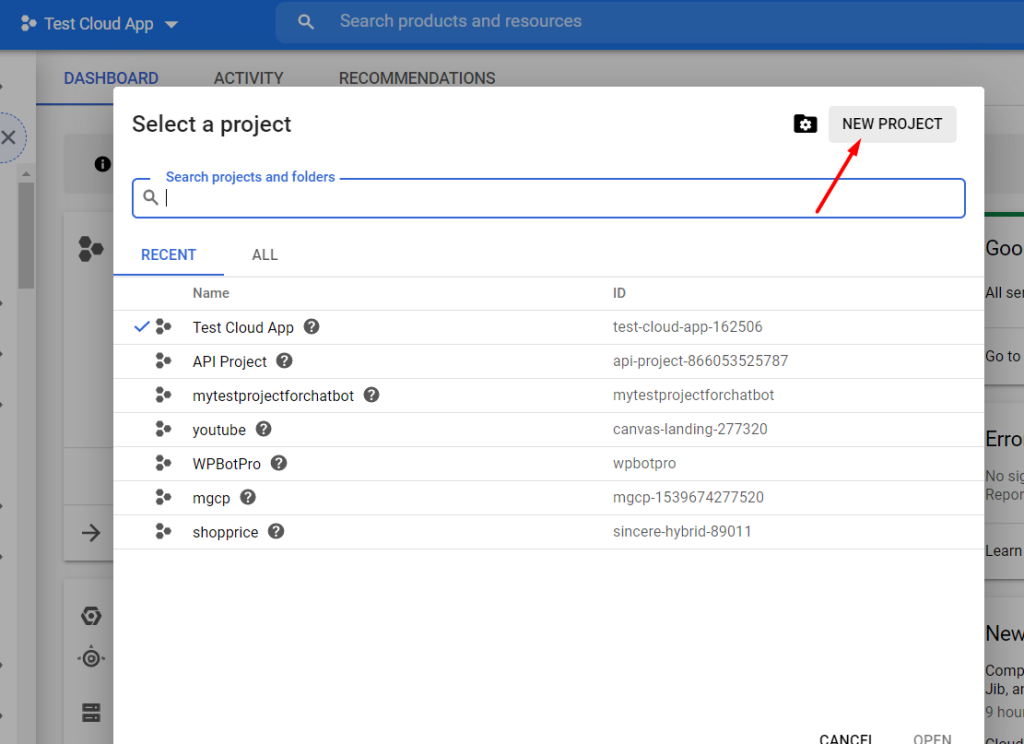
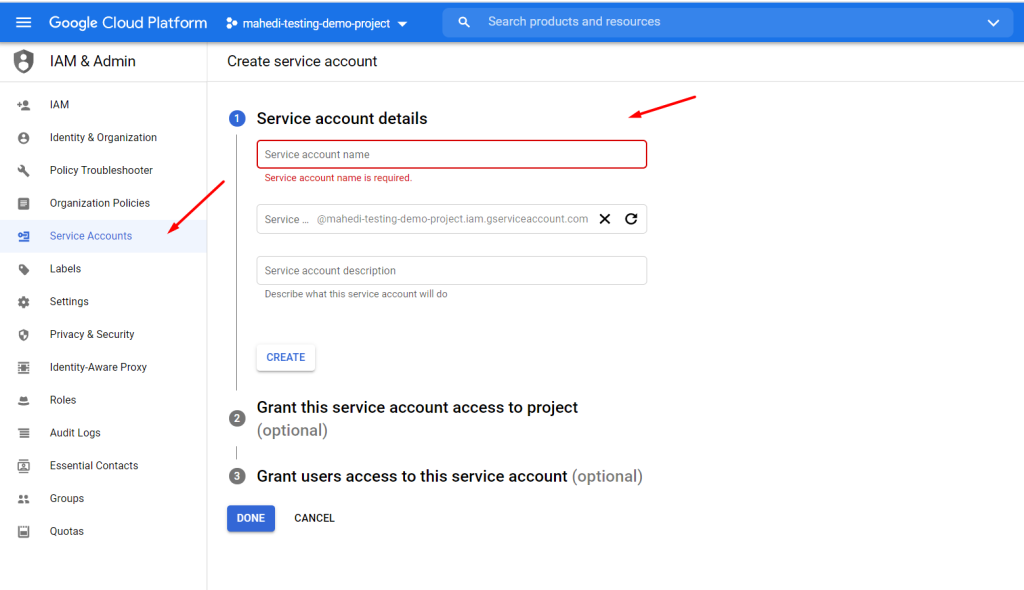
√ After that, you need to create a service account for the project you created.
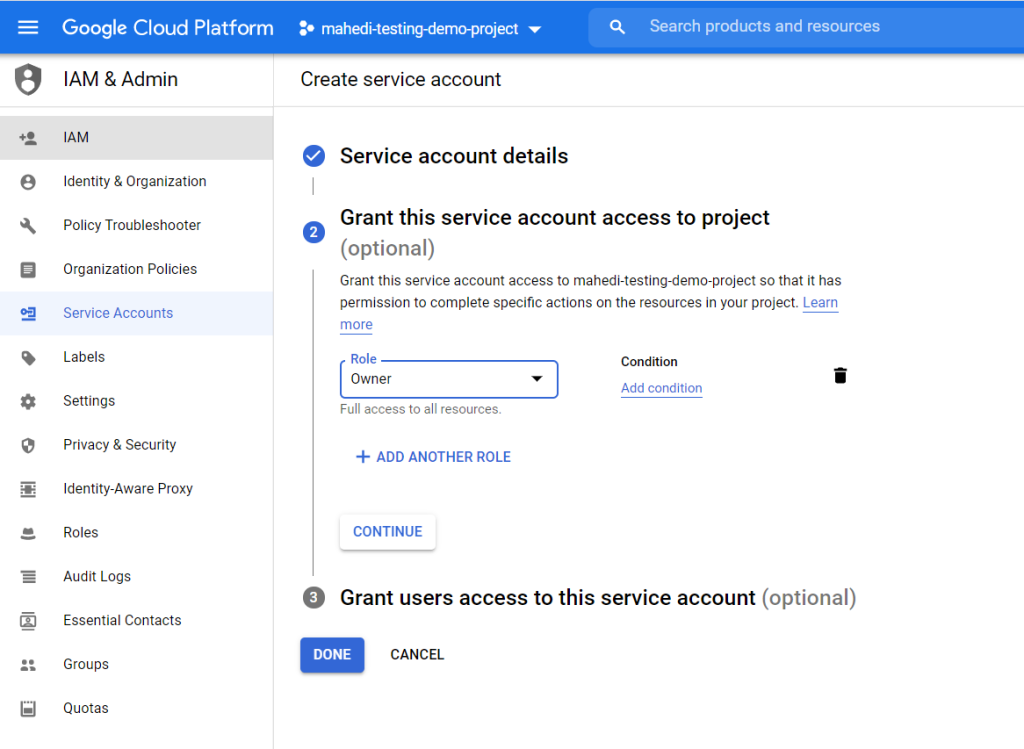
√ Then you need to select Owner as the role for the service account you created. This part is very important.
√ For creating a private key please go to https://console.cloud.google.com/home/dashboard then go to project settings.
√ After that click on the service account tab from the left menu and then create a private key. Select JSON key that you will have to download. You will need to later open the JSON file in notepad and copy the key to the WPBot DialogFlow Settings area.

√ After successfully creating the google project & service account you need to create a Dialogflow agent from this link: https://dialogflow.cloud.google.com/
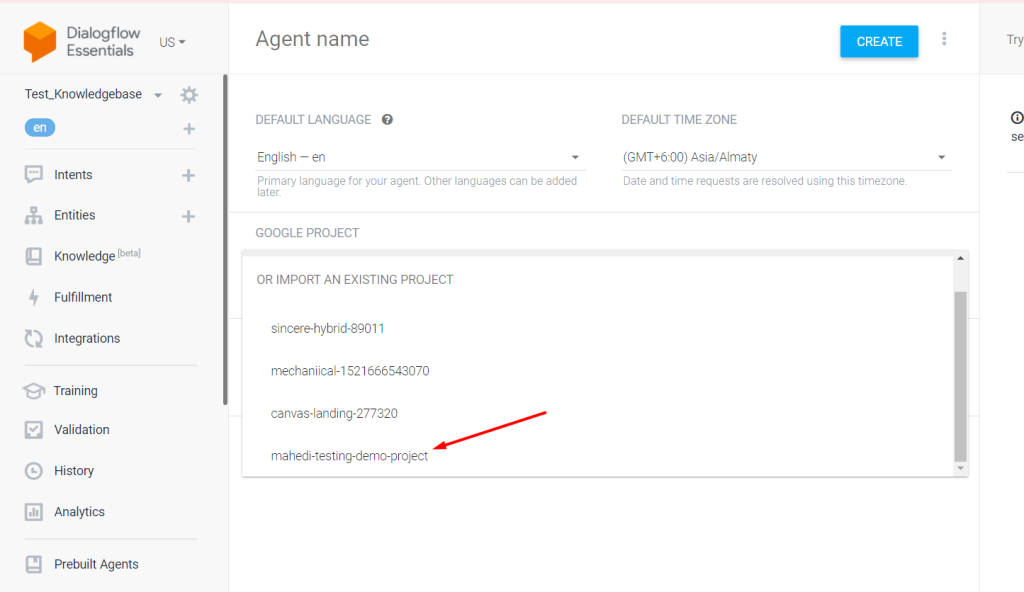
When creating the agent you should see the project you just created under Import and Existing project option.
Select the project and give a name for your agent then hit the create button.
√ You are all set now. You just need to put the private key that you created earlier and project ID in Chatbot Pro > Settings > Dialogflow page.
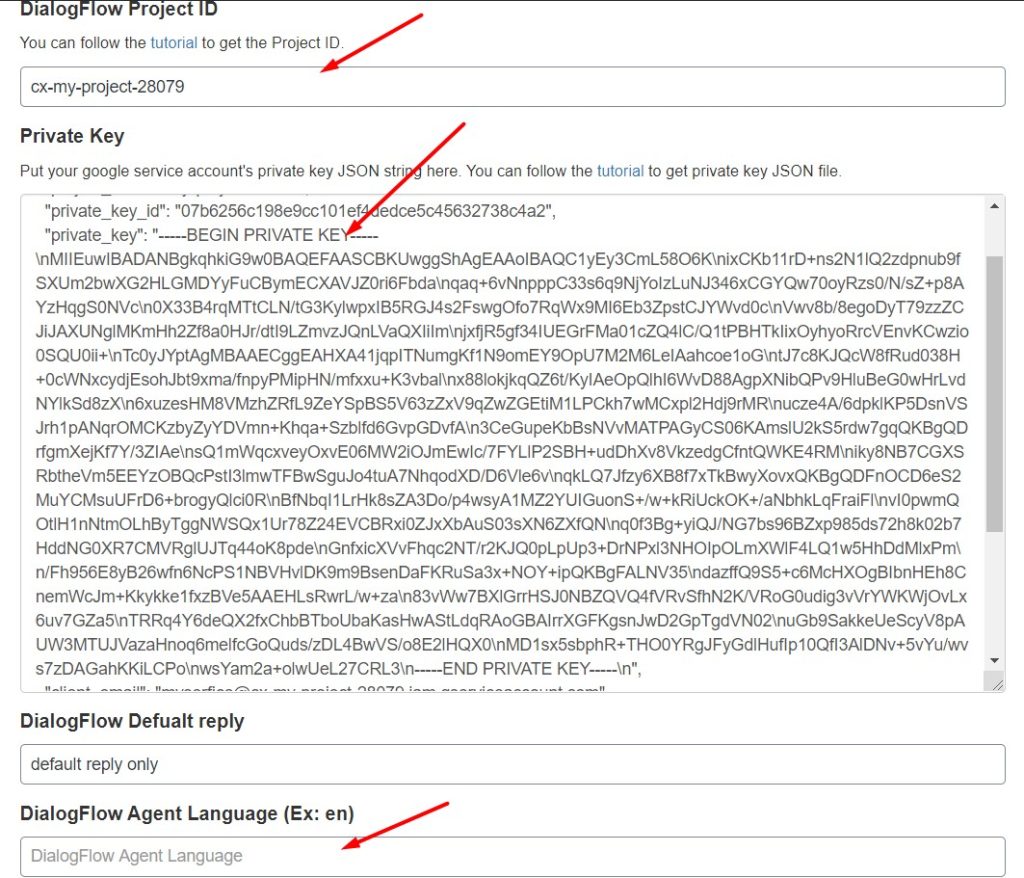
√ Then hit the save button.
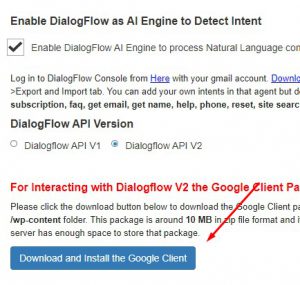
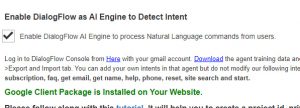
** Make sure that the Google Client Library is installed in the DialogFlow section.
 ========>
√ Test the connection by clicking the Test connection button to make sure all is OK.
Now WPBot is connected to your DialogFlow agent and you can create Intents in your connected DialogFlow agent that will be automatically searched by the WPBot for matching results 🙂
