By using Instagram chatbot Module with WPBot Pro you can automate your instagram messaging. Usually, you would have a conversation with another human on Instagram, but with chatbots, you are not talking with another human, but with a computer.
To setup Instagram chatbot, you need to install WPBot Pro & Instagram Chatbot Module (Comes with Messenger Module) into your wordpress setup and also you need to have an Instagram Business Account.
So first of all you need to create a Instagram Business account if you don’t have one. You can follow this article to create a instagram business account.
Phase – Facebook App Creation
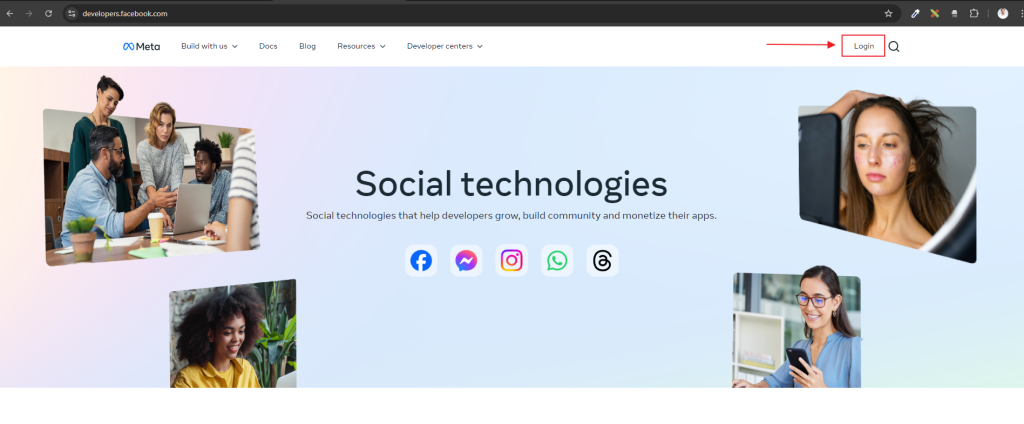
1. Go to https://developers.facebook.com/ from your web browser and Click on Login link.
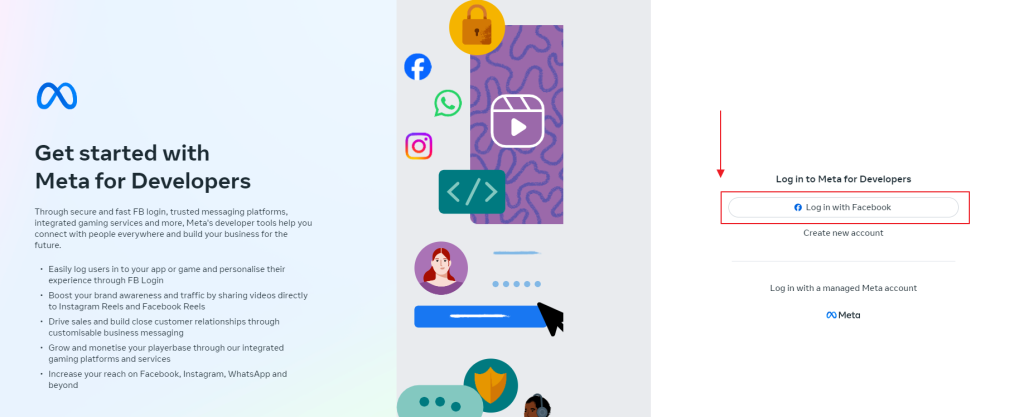
2. Click on “Log in with Facebook” button, then login with your facebook account by providing a valid User ID and Password.
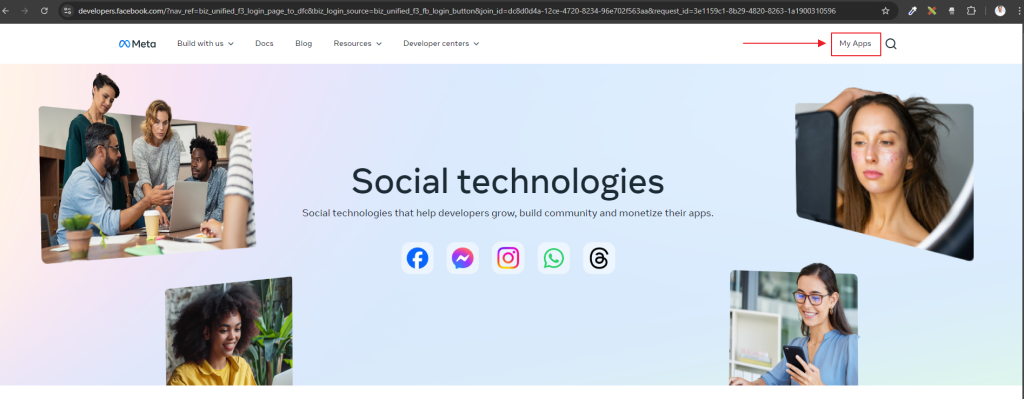
3. You will get a page like below, click on “My Apps” link.
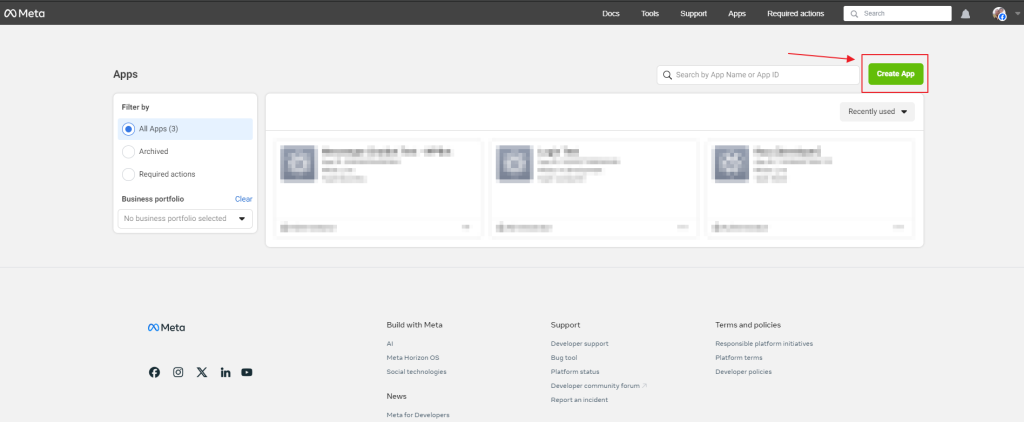
4. Now you need to create a new Facebook App. Click on “Create App” button to proceed.
5. While you are at “Create an App” screen, “Business” will appear in left timeline, then click on “Next” button. You will be redirected to “Use Cases” field.

6. Select “Others” from “Use Cases” phase, then click on “Next”.
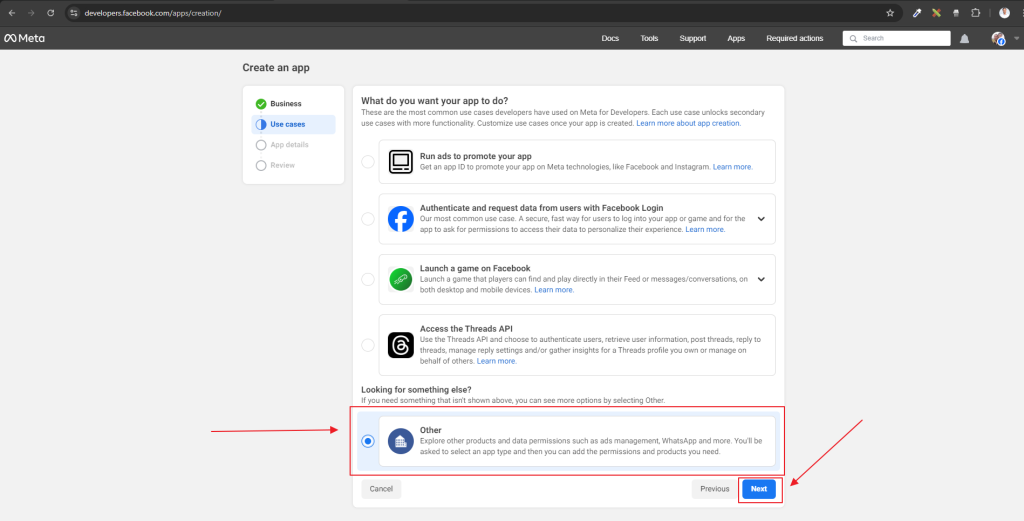
7. From “Type” selection, select “Business” and click on “Next”.

8. In “App Details” screen, put your app name inside “Add an app name” field. Then put your contact email address inside “App contact email” field. Next click on “Create App” button.
For example we put – “DEMO INSTAGRAM APP for QC” as app name.

Your new Facebook App will be created and you will get an APP ID like below. Click on “App Settings –> Basic” to set basic configurations for your newly created app.
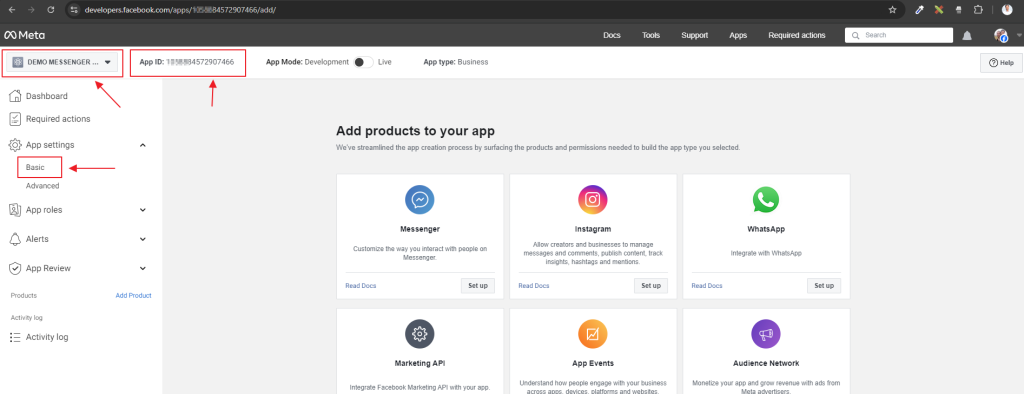
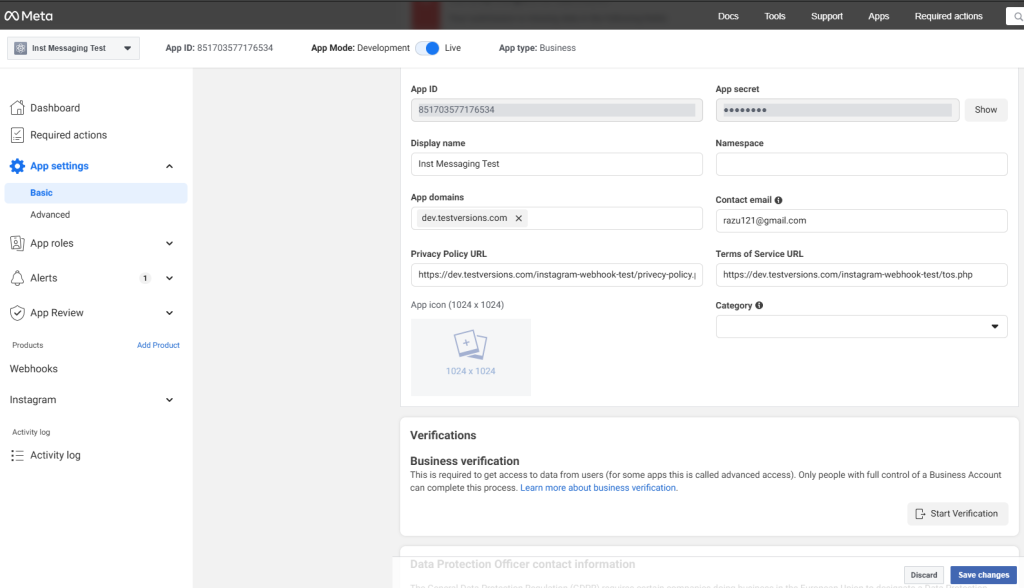
After that please follow the steps to create a Facebook App and after created you would be redirect to the App dashboard page. Then you need to go to App Settings –> Basic page and add the following information.
- App Demain.
- Privacy Policy
- Terms of Service
- Then save changes
See the screenshot below:
After you are done with the Basic settings you have add products in your facebook app. In order to do that please click on the “Products” button from left menu.
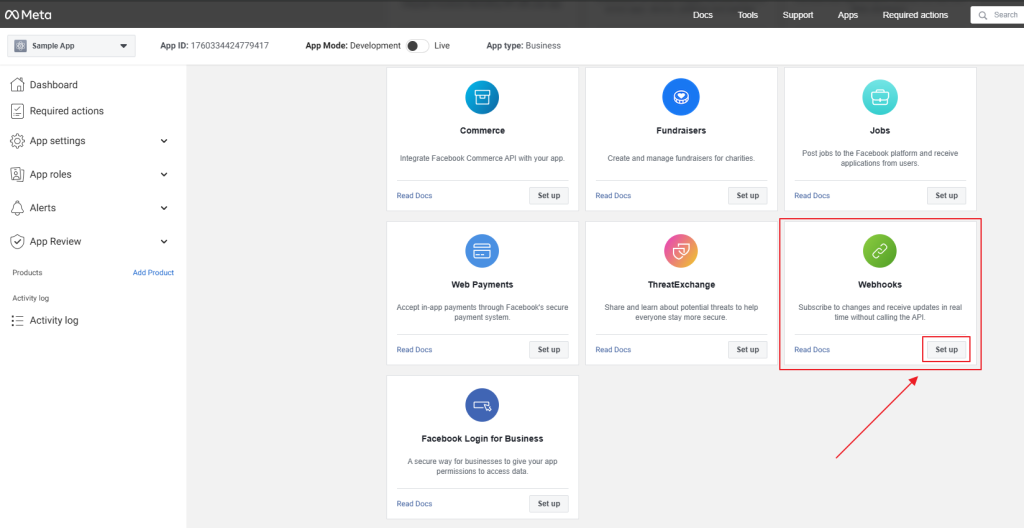
Then click on the setup button for “Webhooks”, & “Instagram” product.
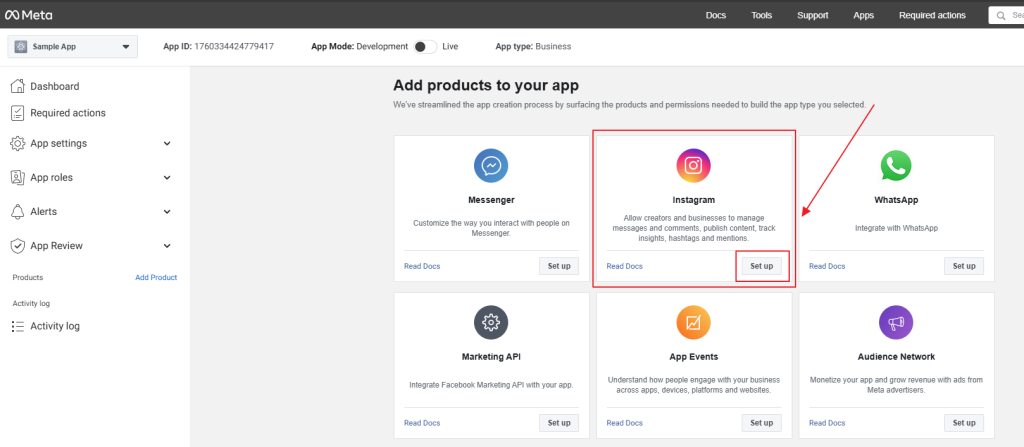
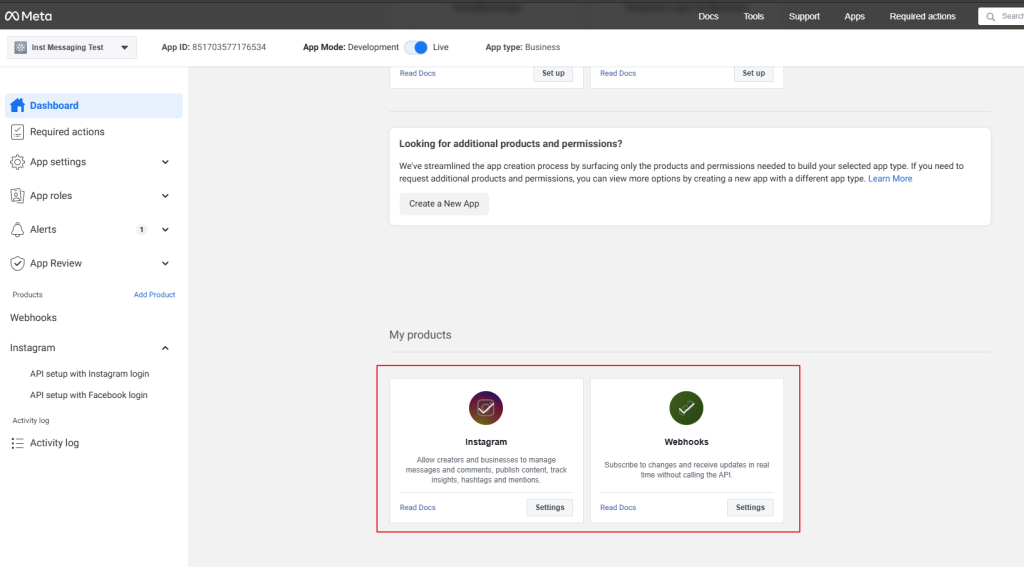
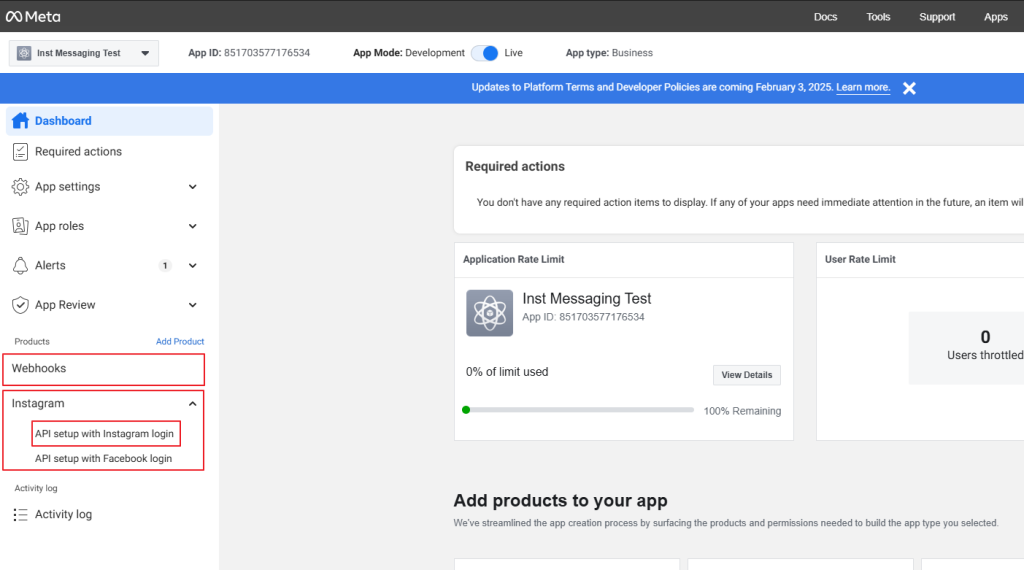
After adding “Instagram” and “Webhooks” products respectively, you will see you dashboard as below. Under my products section, these two added products will be listed. Also, in left side menu, there will be entry for “Webhooks” and “Instagrams” menu.
Products
Webhooks
To setup webhooks please go to the webhooks page from left menu.
You need to subscribe to couple more objects. So let’s begin with “Permissions” object which you can select from the top dropdown. Click on the click on the subscribe to this object.
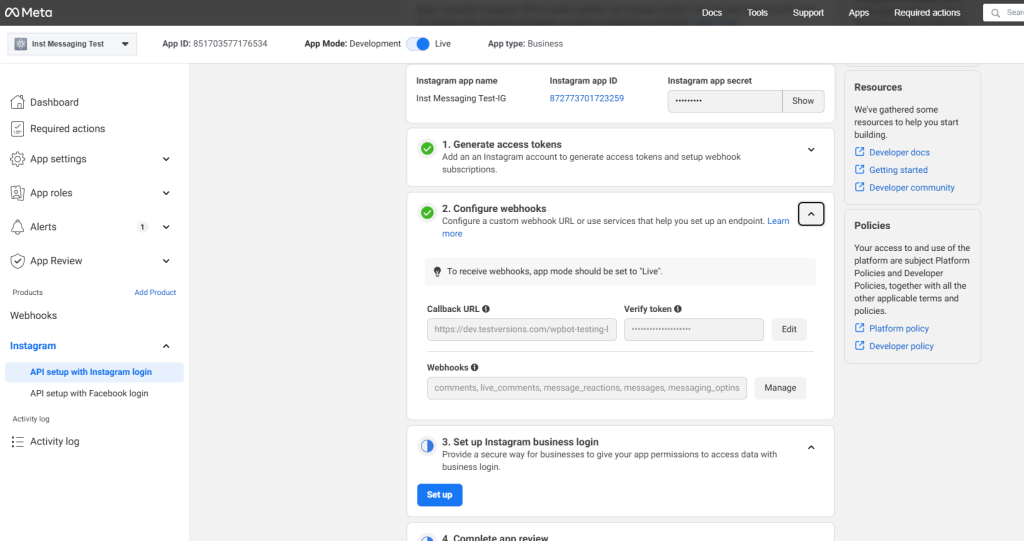
Click on “Edit” button. After that you will see a popup where you need to put callback url & verify token like the below screenshot.
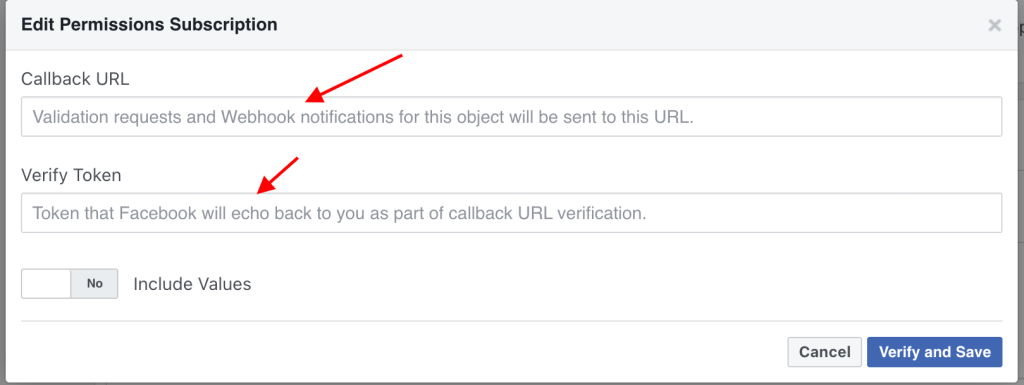
For Callback URL, Please go to WordPress Dashboard –> Instagram Chatbot page and take the value for Callback URL field and add it to the Callback URL field in Facebook APP Webhook setup page. Similarly, add the verify token in your website and copy that inside Verify Token field of the webhook subsctiption section.
For Verify Token, again go to WordPress Dashboard > Instagram Chatbot page and put a random unique text in the Instagram Verify Token field and Enable the checkbox for Instagram Bot then hit save button.
Next click on “Verify and Save” button.
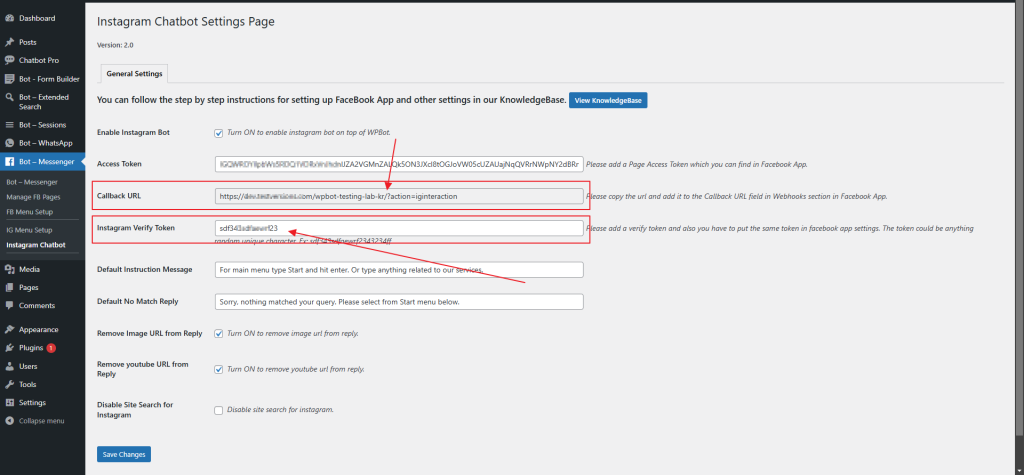
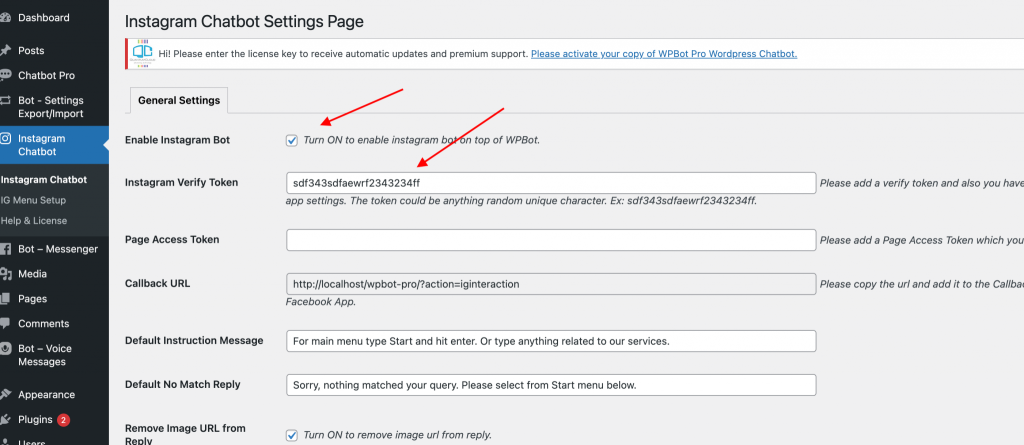
Click on “Manage” button under “Webhooks” section, select all the Subscribe checkboxes, then click on “Done” button.
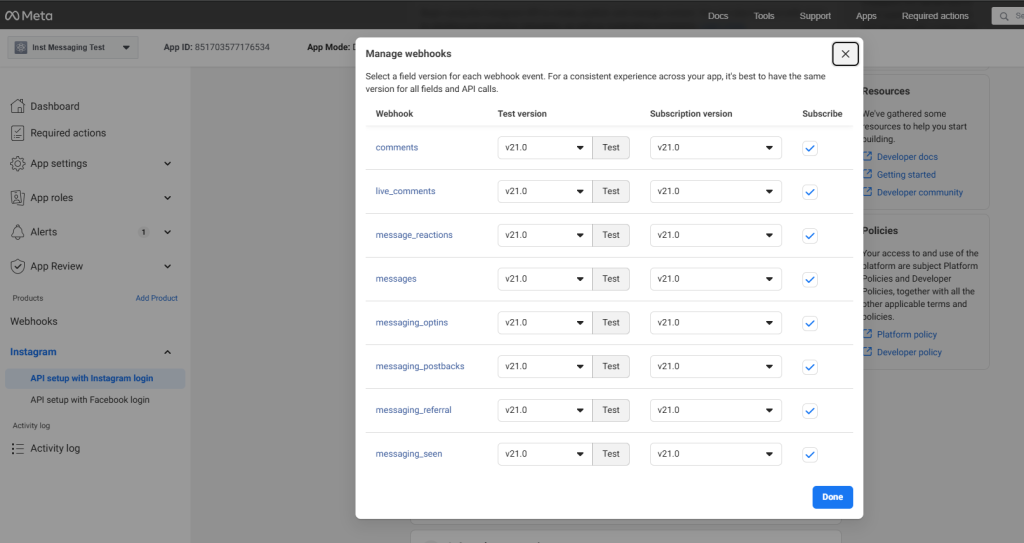
Also subscribe to Permissions object same way and you need to make sure you subscribed for the following below permissions.
- instagram_basic
- instagram_manage_comments
- instagram_manage_insights
- instagram_manage_messages
- pages_manage_metadata
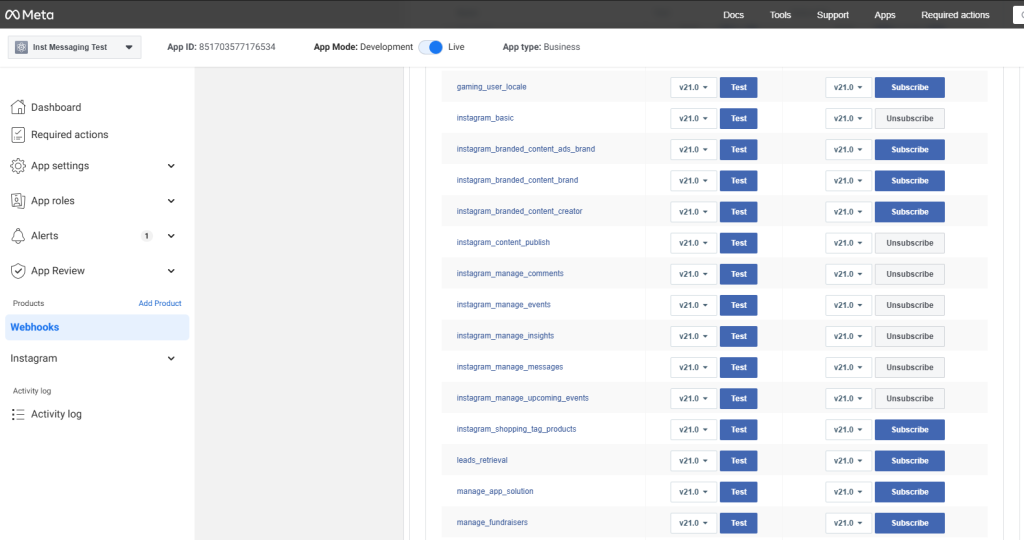
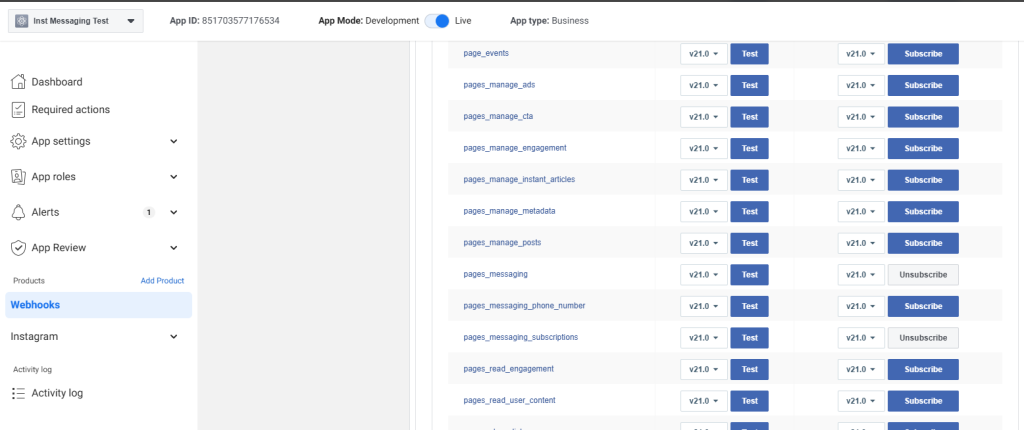
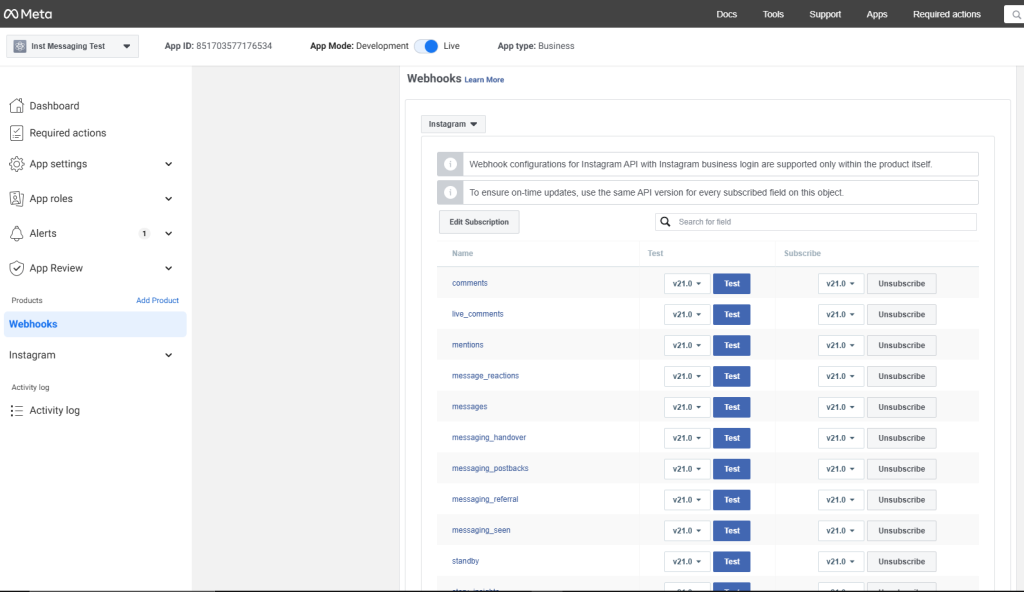
Also you can learn more about webhook permissions in this article.
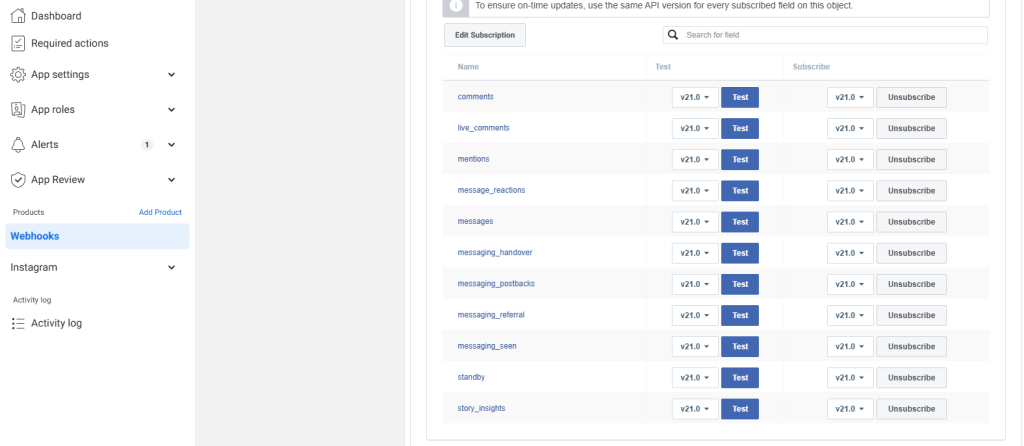
After that you need to subscribe to Instagram object as well by following the same procedure that you have done for above objects.
For Instagram object you need to also subscribe to the following field that is showing on the below screenshot.
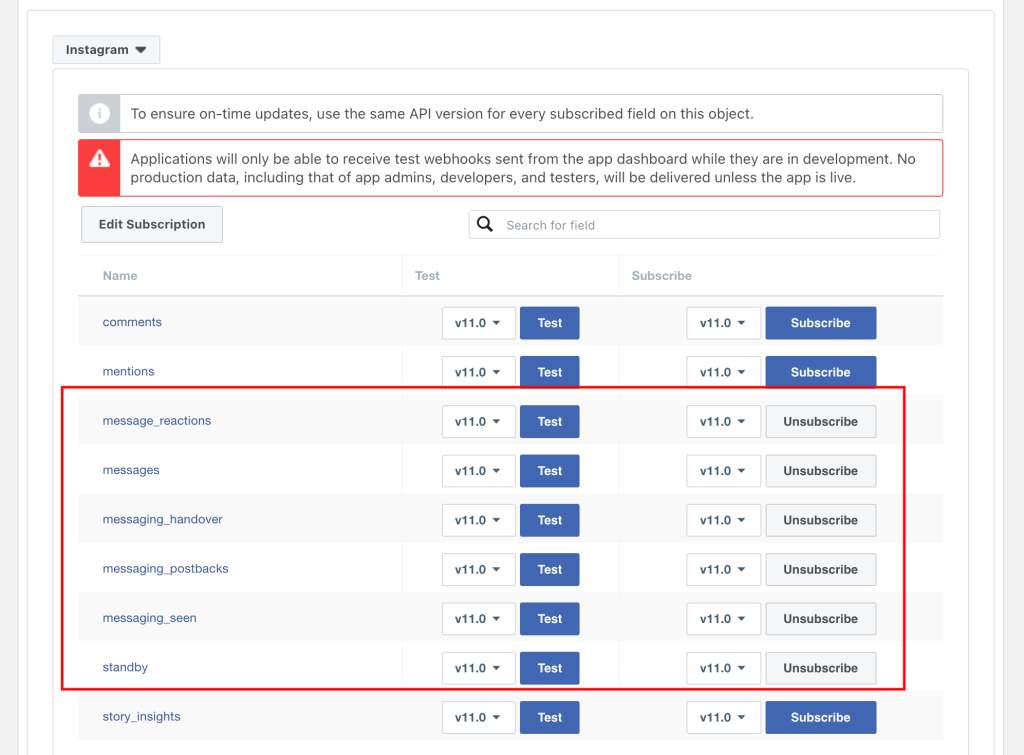
That is all you need to setup for Webhook.
Instagram Access Token Generation:
- Click on “API Setup with Instagram Login” then login with your Instagram Business Account.
- After that, your instagram account will be listed as below under “Generate Access Token” section.
- From there, click on “Generate Token” button.
- Copy the Token and Paste it inside your websites “Access Token” field.
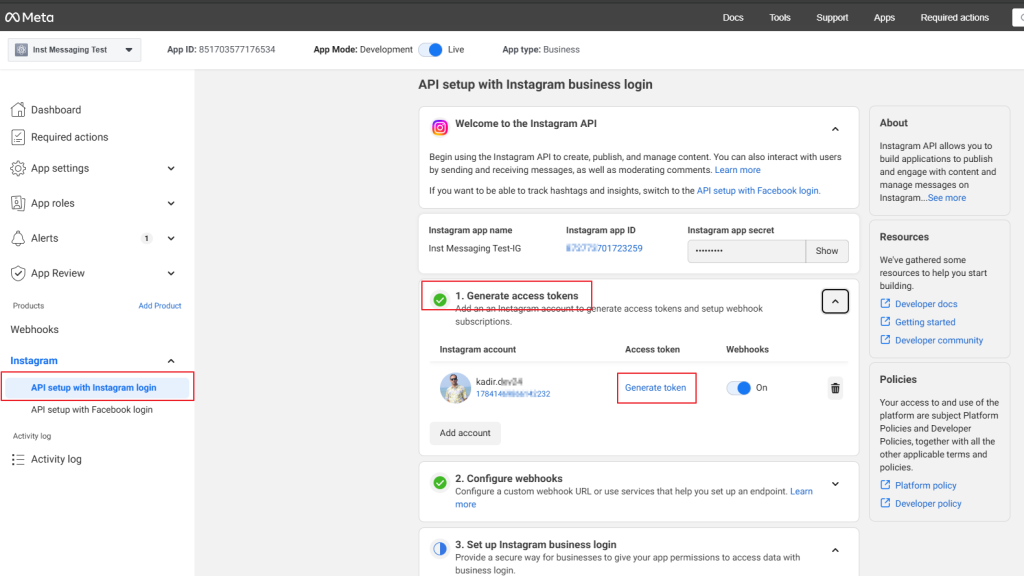
You need to copy the Token add it the Page access token field from WordPress Dashboard > Instagram Chatbot page and hit the Save Changes button.
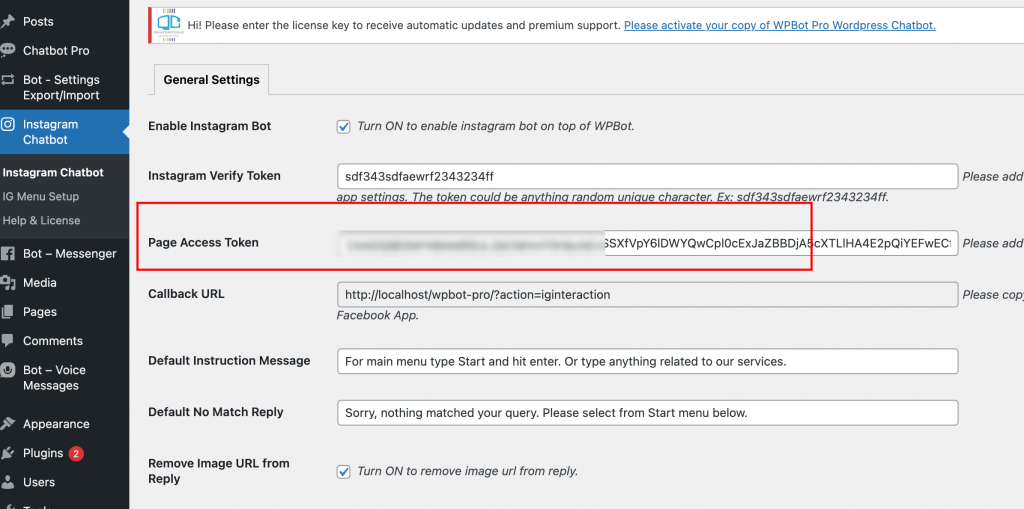
That is all for Instagram product setup.
The following permission is needed for the Facebook App to work with Instagram Chatbot.
- instagram_basic
- instagram_manage_comments
- instagram_manage_insights
- instagram_manage_messages
- pages_manage_metadata
- pages_messaging
You can learn more about the Permissions from here. https://developers.facebook.com/docs/instagram-platform/instagram-api-with-instagram-login
Put your App in LIVE mode, then your facebook app will be activated and you can make automated conversations with your picked Instagram Business Account using private message option.
Add some menu items for Instagram Start Menu, as below –
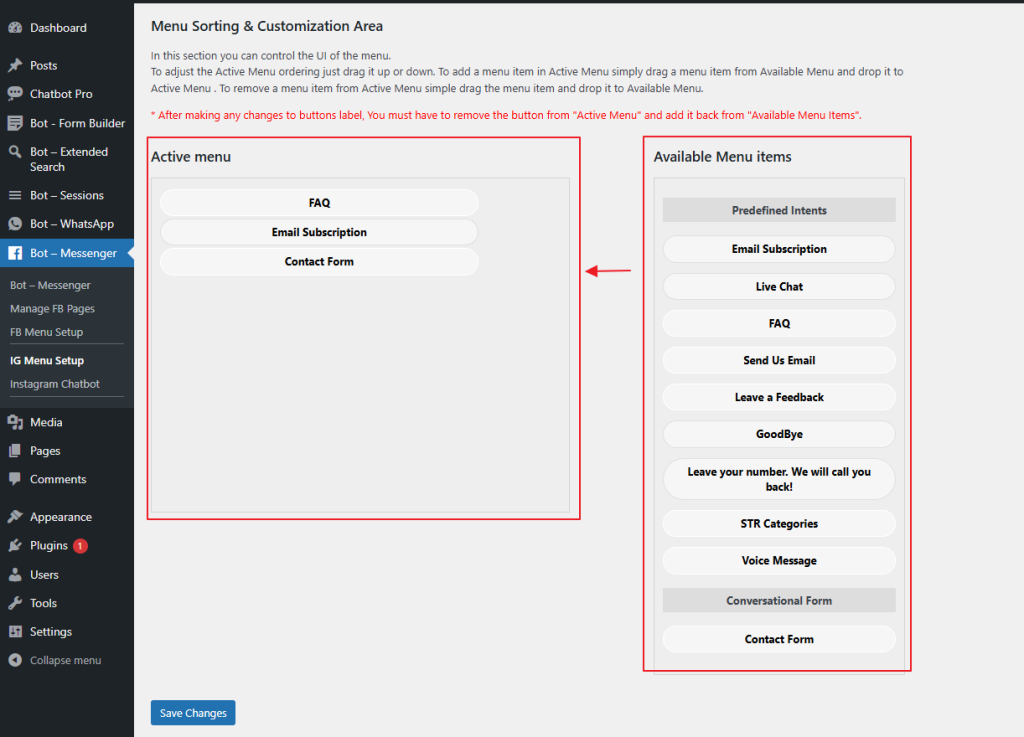
***You can send some keywords as message text to get automated response from the bot, like – start, get started, faq etc.
