- Enable DialogFlow as AI Engine to Detect Intents and to process Natural Language commands from users.
- DialogFlow client Access Token You will need an Access Token from DialogFlow. Log in to DialogFlow Console from Here with your gmail account. Create a new agent and copy the Client Access Token from Settings.
- Import Agent to DialogFlow Download the agent training data (From WPBot Setting page) and import to DialogFlow->Settings->Export and Import tab. You can add or modify Training phrases under the Intents. But .do NOT modify or delete the Intents we have created.
- DialofFlow Defualt reply for no intent match is “Sorry, I did not understand you. You may browse below. ” Change it to anything else if you want. The bot will then fall back to Start up buttons and premade intents.
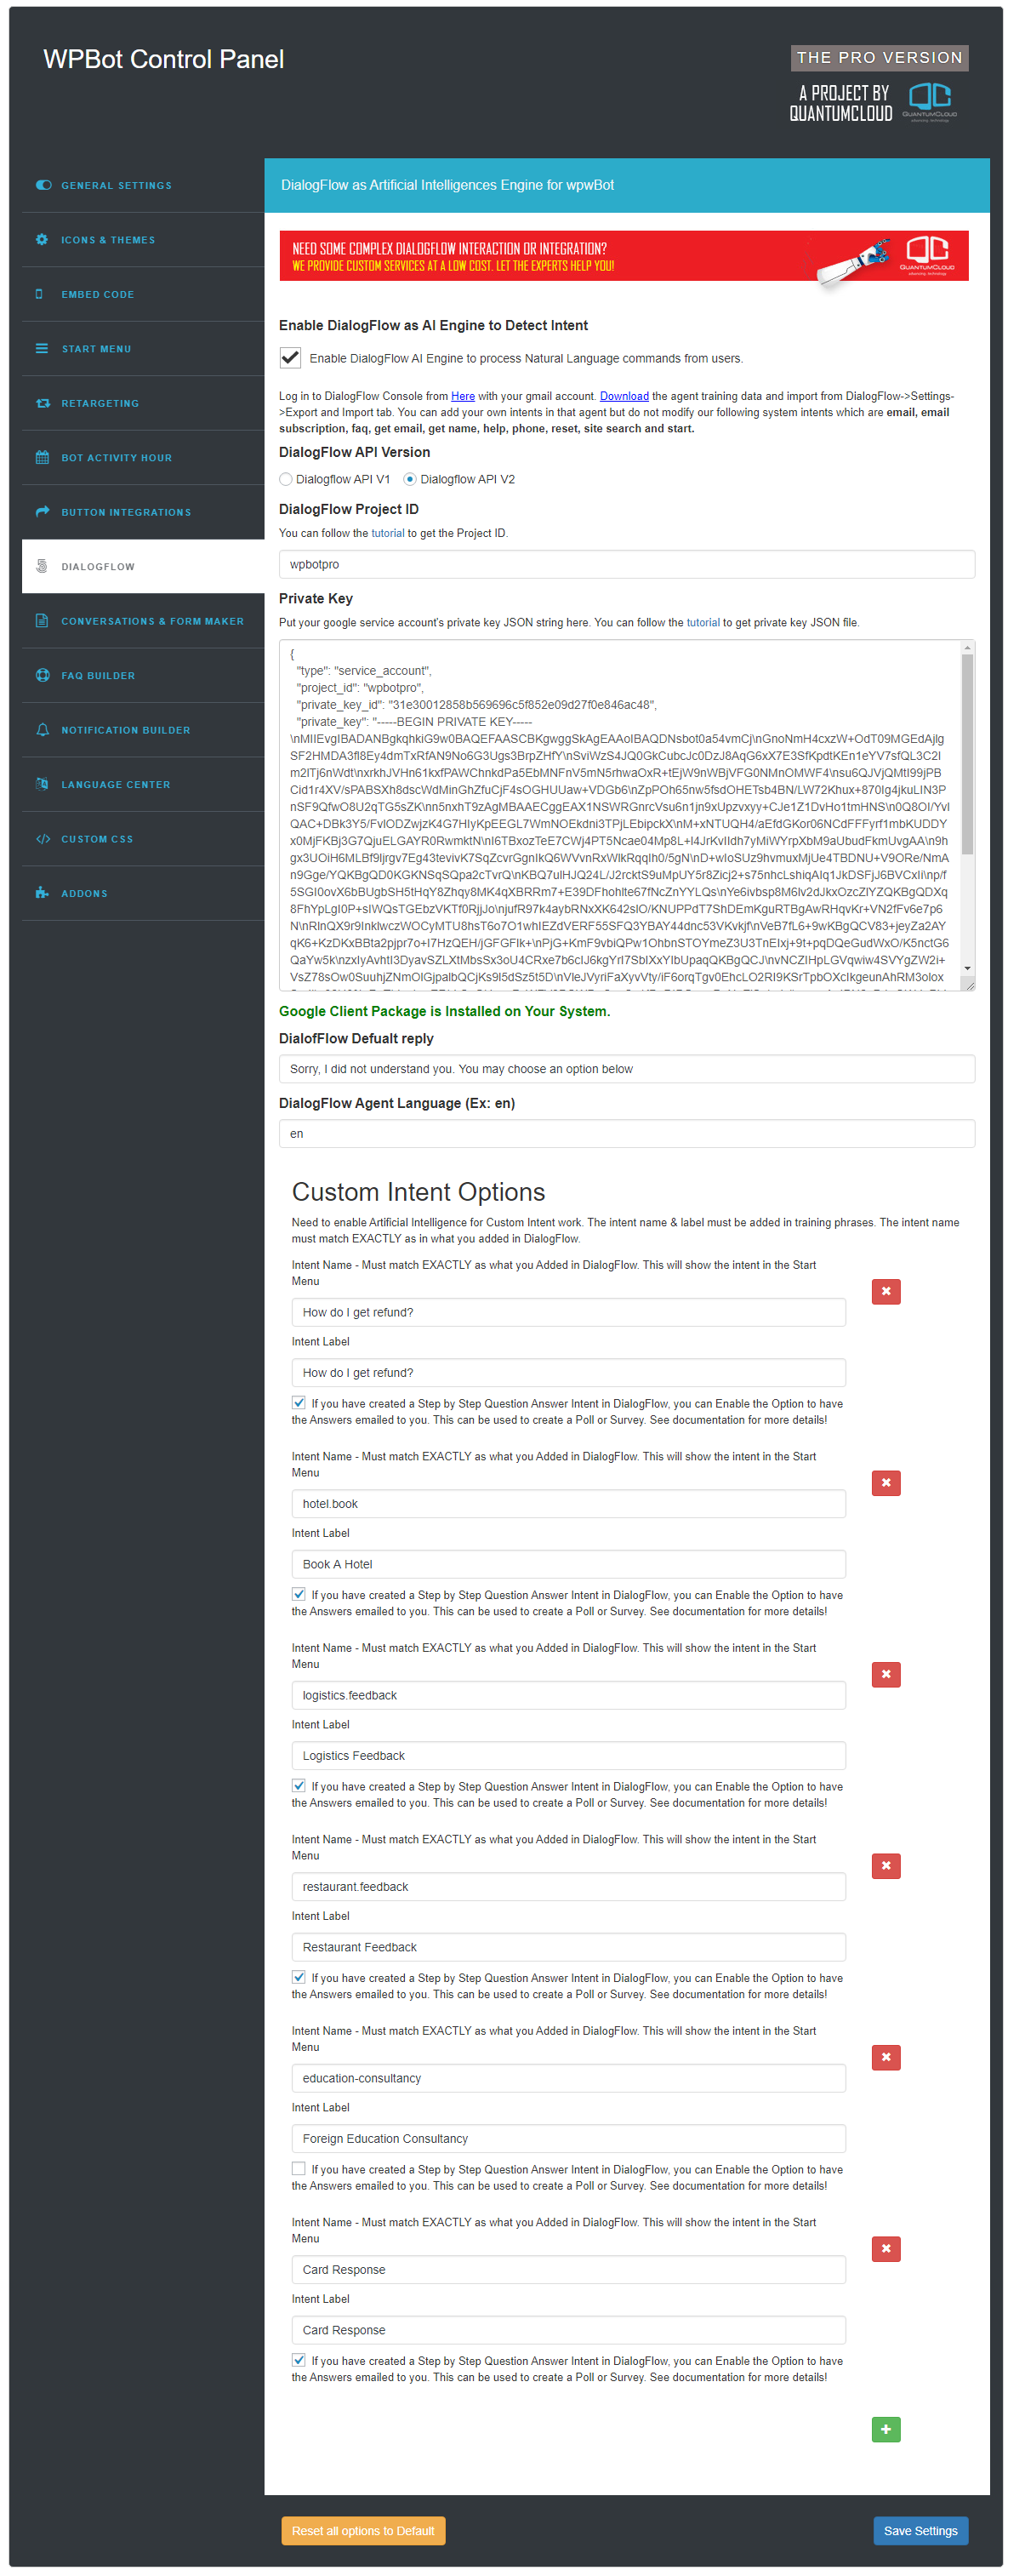
- Allow custom intent and reponse from DialogFlow Enable to get Intents and Responses from the DialogFlow for the custom intents you create.
- Custom Intent – By creating custom intent you are able to add it as a button on WPBot message board. You will able to see the button if you type start and hit enter on wpbot. So you can extent the functionality of WPBot by creating your own dialogflow intents.
- Intent Name should be identical to dialogflow intent name and the intent name must be added in dialogflow intent traning phrases.
- Intent Label – It will show up as custom intent button label. So you must have to provide a intent label. It could be any you want to label up the custom intent button.
- If you have created a Step by Step Question Answer Intent in DialogFlow, you can Enable the Option to have the Answers emailed to you. This can be used to create a Poll or Survey – If you click on the checkbox it will send the specific intent conversation to wpbot admin. So you can easily get feedback from user by creating a custom intent and click this box to get an email.
Also you will be able to add more custom intent by clicking the green plus(+) sign.
You may follow the docs to create custom DialogFlow Agent Intents and Entities for step by step query option.
Creating Custom Intent, Entities, Action & parameter, response for Step by Step query for DialogFlow agent
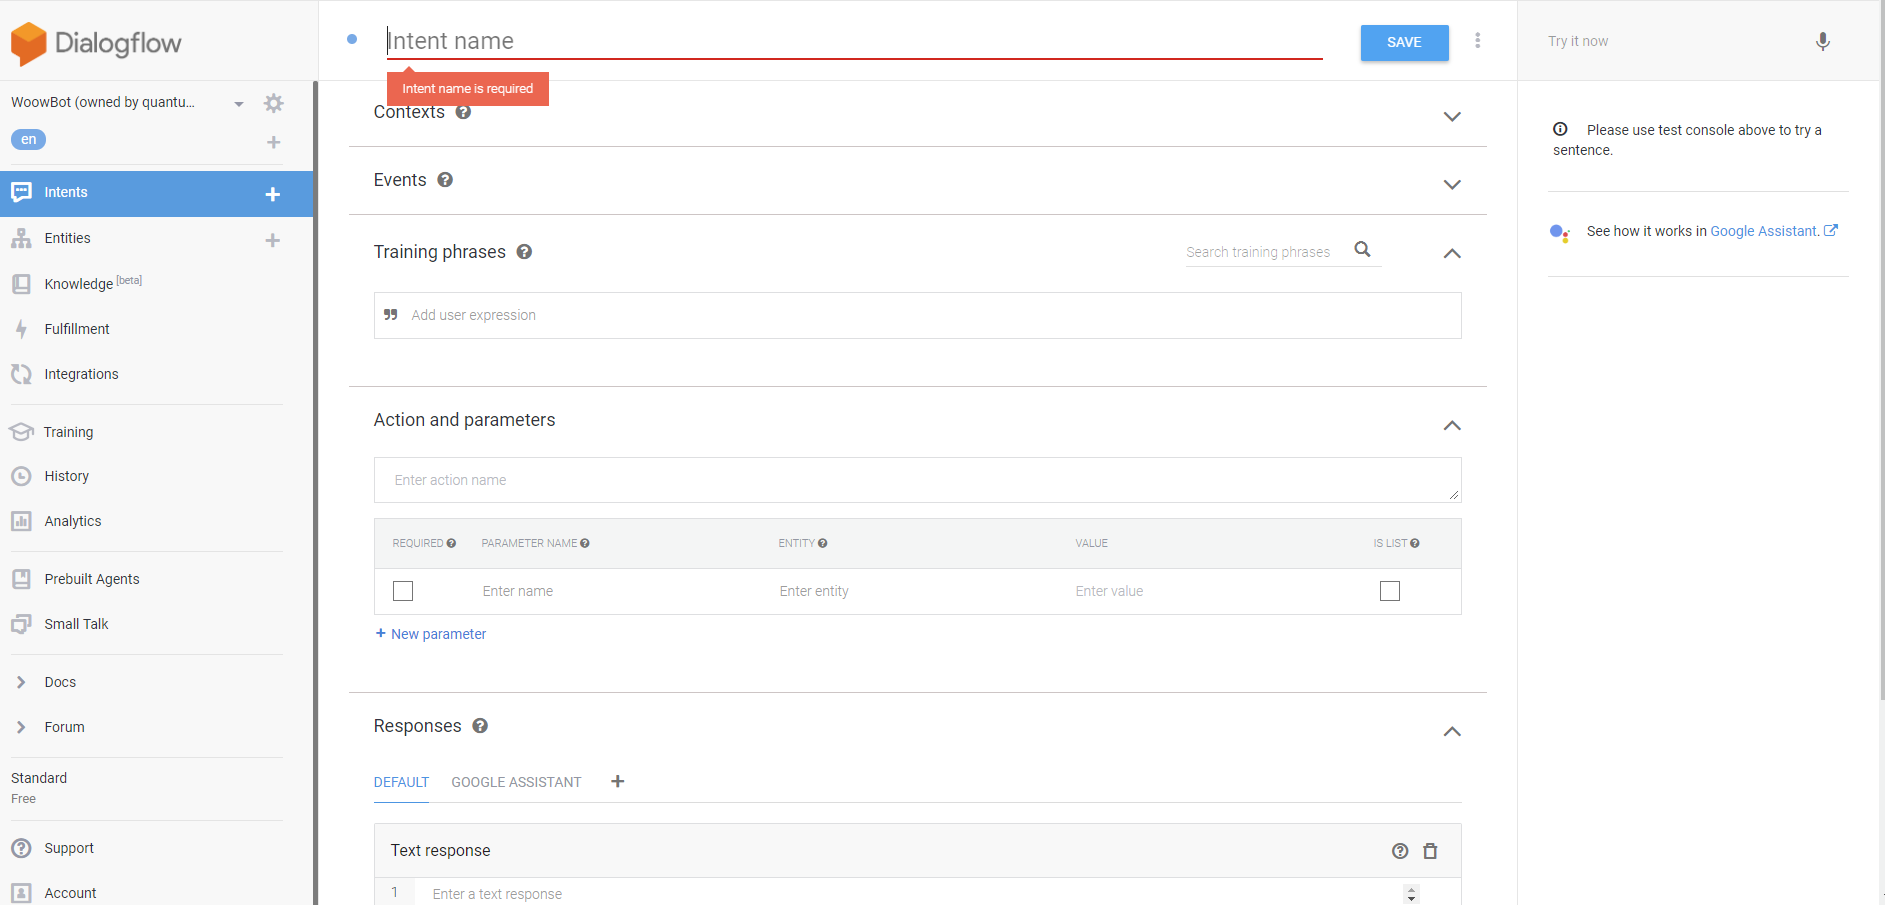
- Create Intent and Training phrases To create intent click on Intents + (Plus) sign from left side panel .
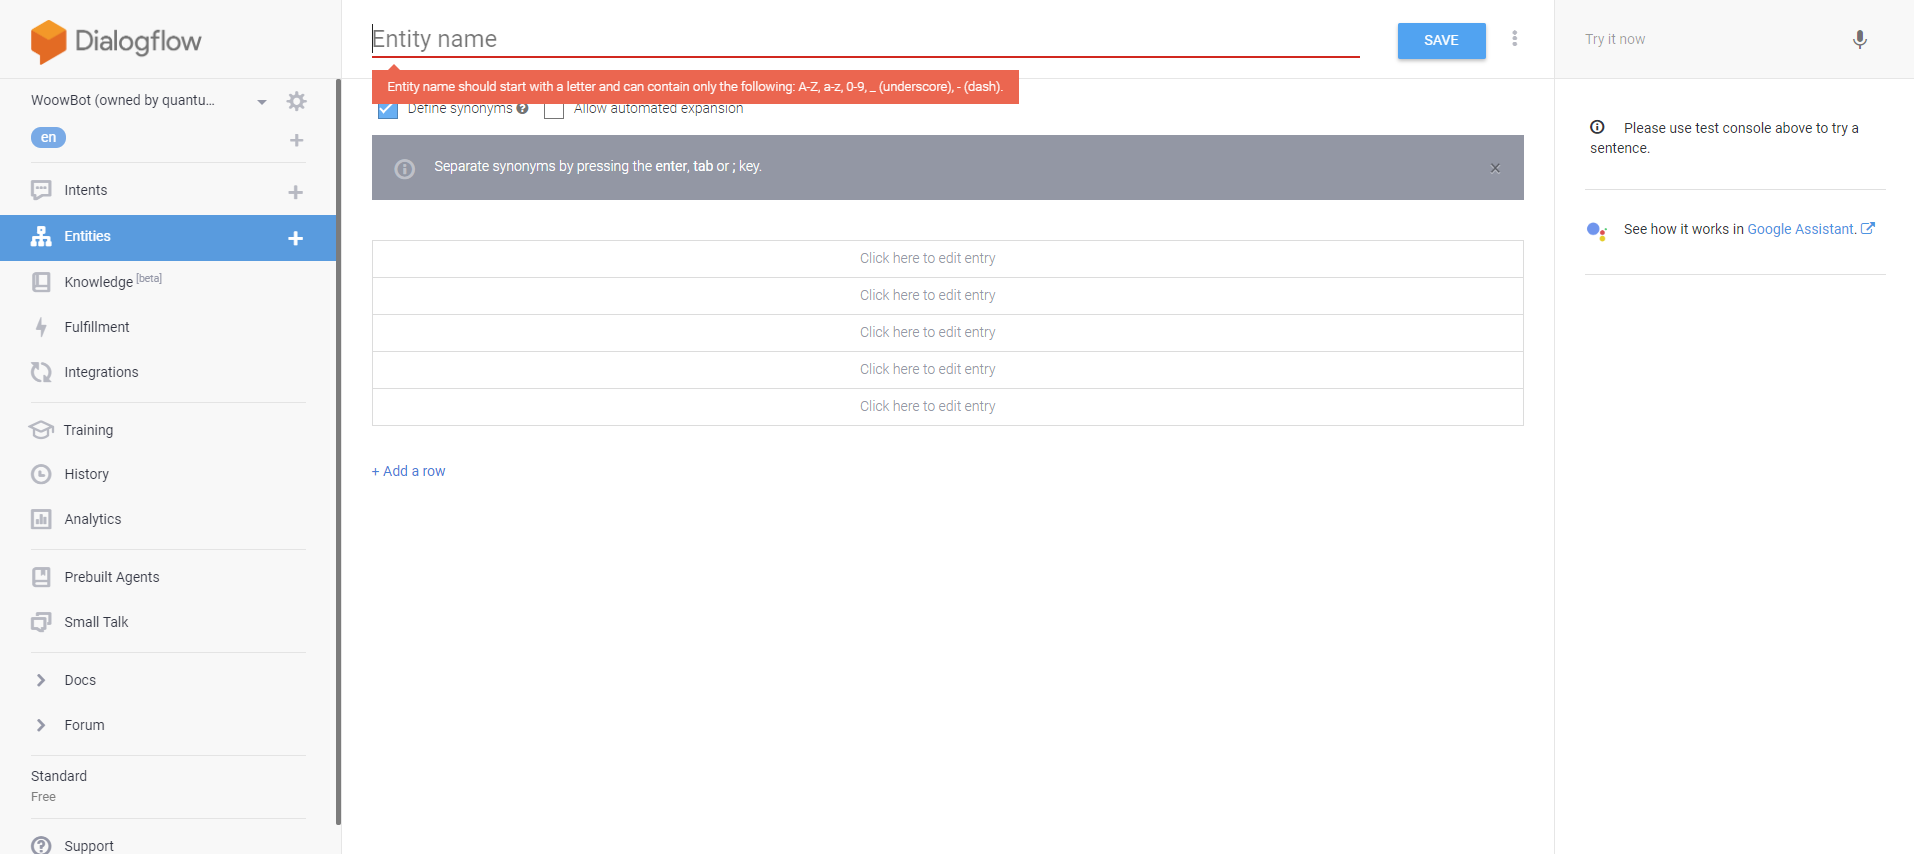
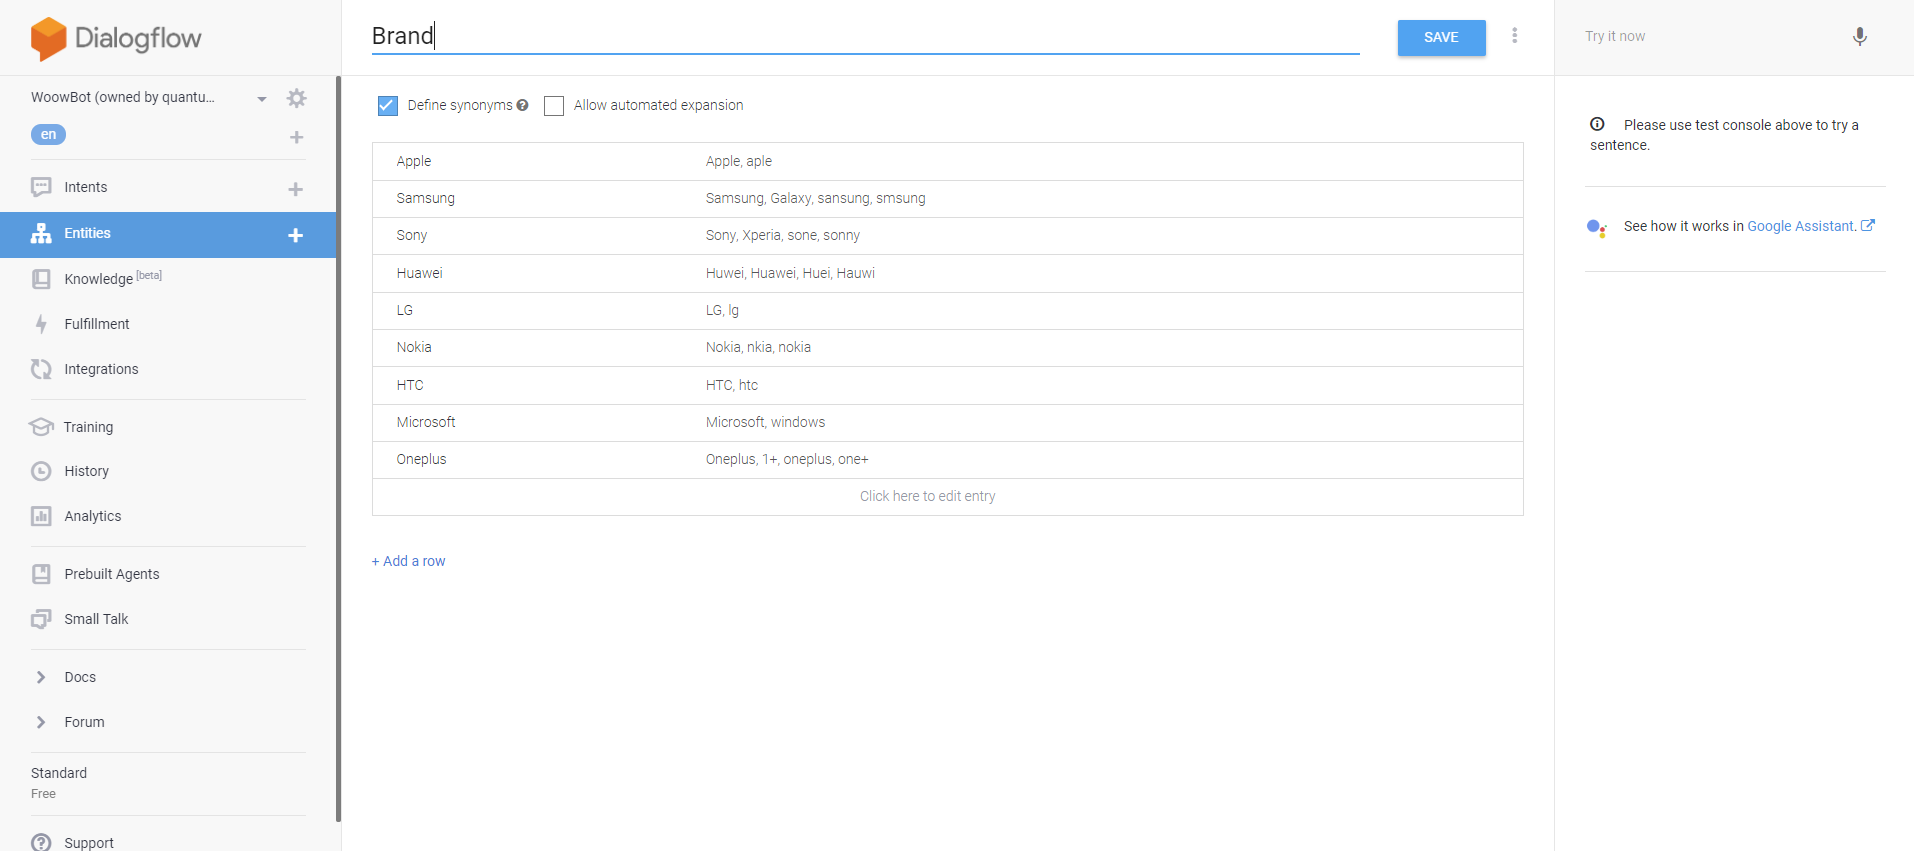
- Create Entities and Define synonym To create intent click on Entities + (Plus) sign from left side panel .
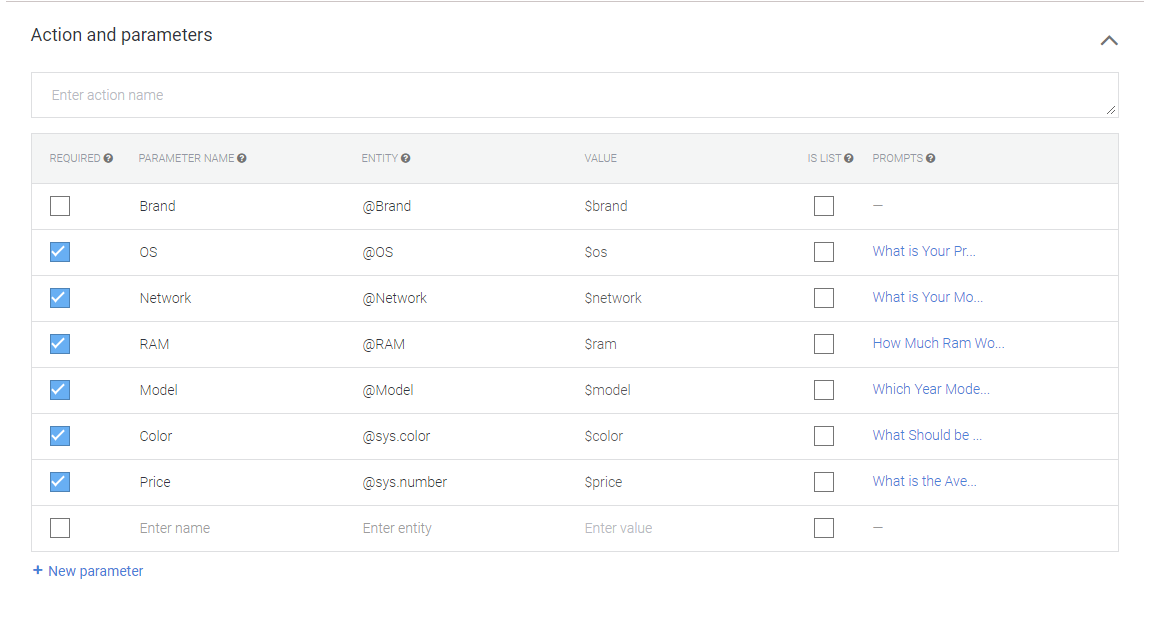
- Action and parameters To get parameter reponse as value from user need to make parameter as required .

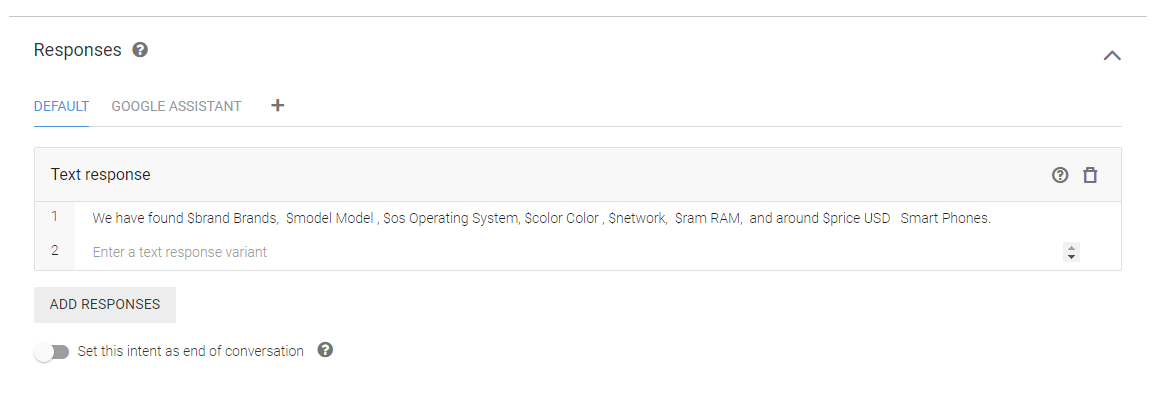
- Creating response for the intent With variable value of paramters DialogFlow can give response .
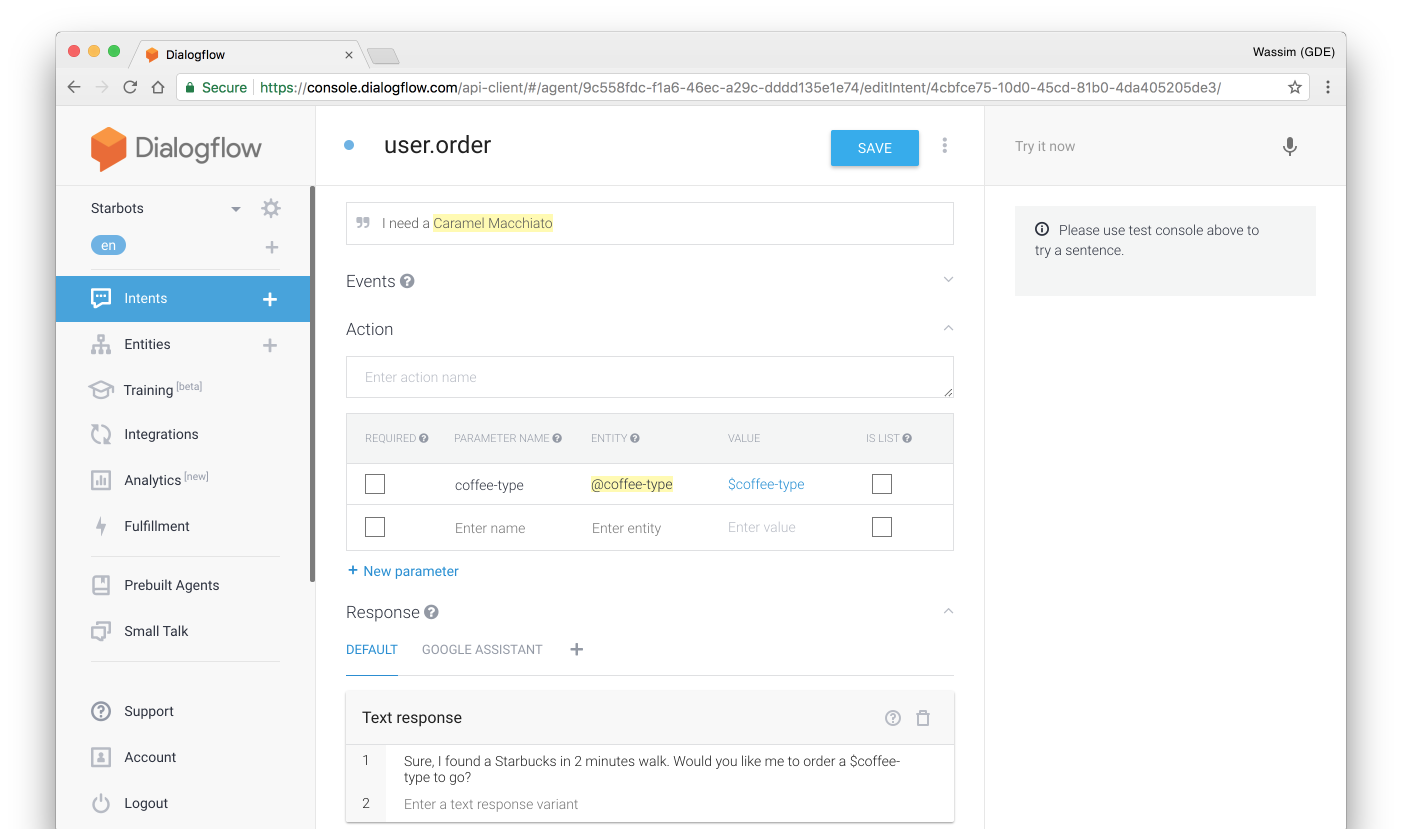
Creating follow-up intents for DialogFlow agent
First you have to create main intent that will match the user’s order request such as “I need a Caramel Macchiato.”.
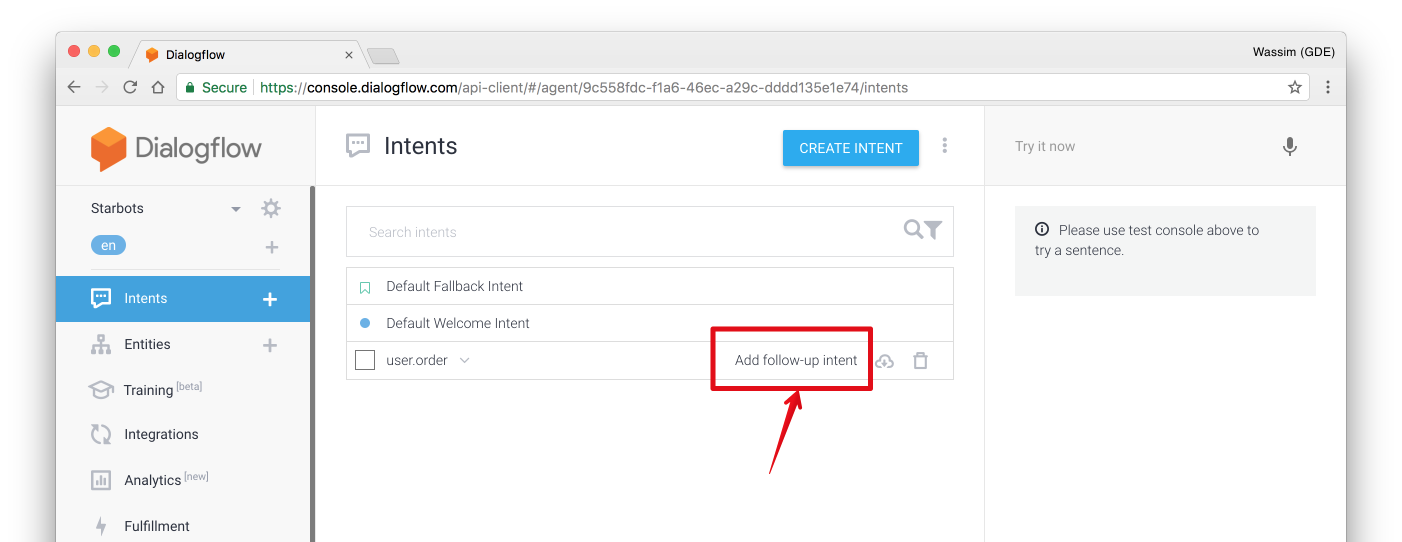
Next, we’ll add a second intent nested inside the main intent, these nested intents are called “follow-up” intents. Follow-up intent are normal intents that hold the context of their parent intent. In order to add follow-up intents, simply hover your mouse over an intent and click on the “Add follow-up intent” label:
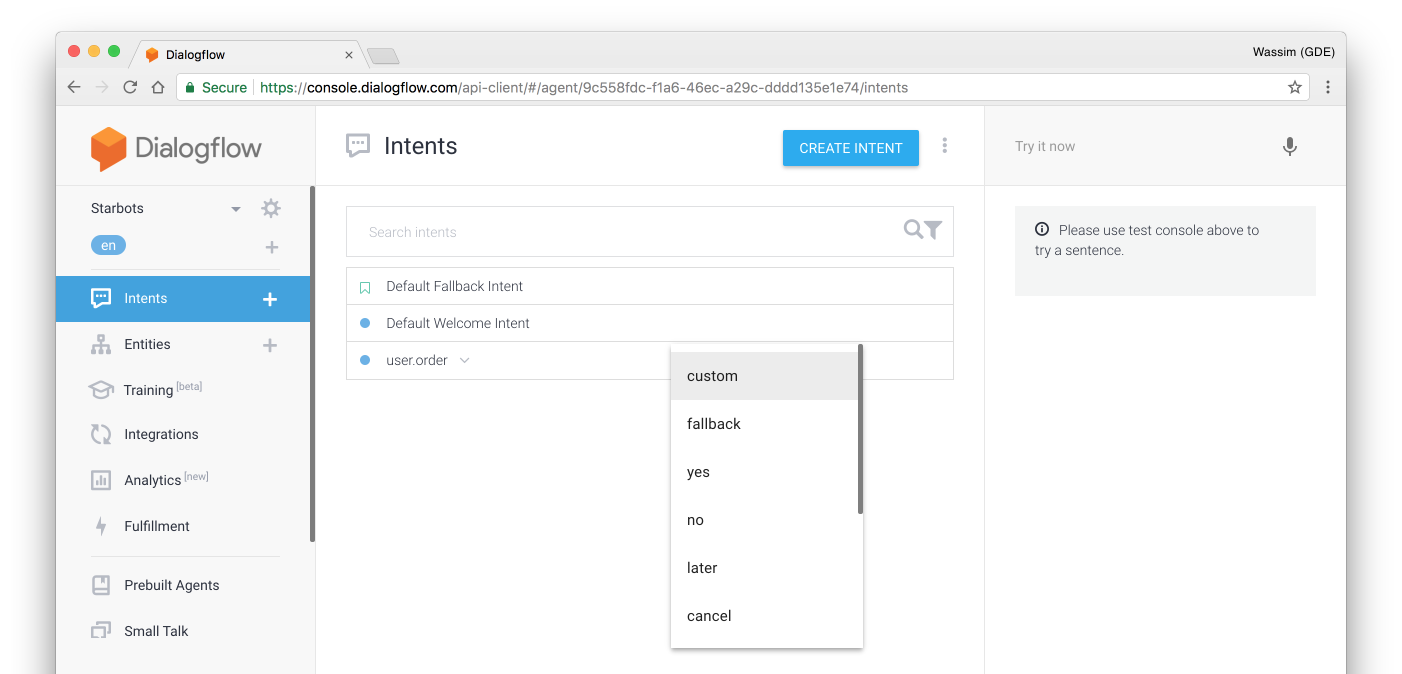
This will add a new intent nested inside the selected intent. We can choose from a wide variety of common follow-ups expressions such as confirmations, repeating, canceling…etc. Or, we can just add a custom follow-up intent:
Let’s get back to our conversation from above. We have two scenarios that we need to design:
- If the user just asks for a coffee and then confirms the order, we just need two intents: the main intent + a “yes” follow-up intent.
- If the user wants to add extra toppings, we then need three intents: the main intent + an “extra” follow-up + a “yes” follow-up (for the extra).
In the end, we’ll have something like the following:
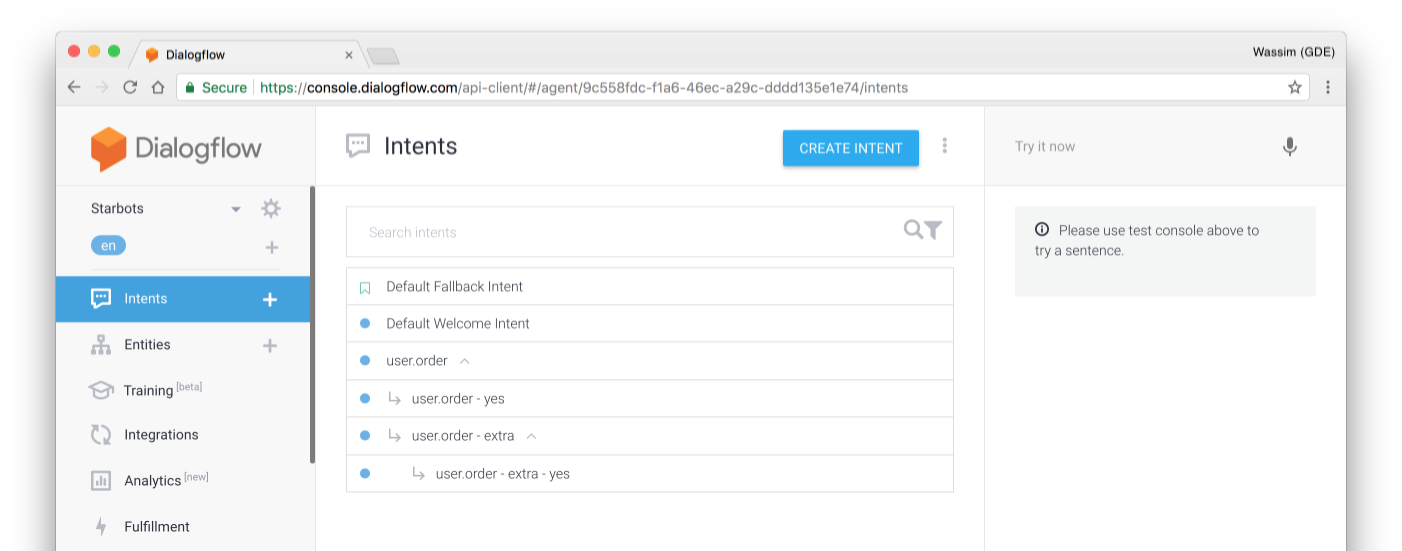
- user.order: our main “order” intent.
- user.order — yes: a confirmation for the order.
- user.order—extra: an intent for the extra toppings.
- user.order—extra—yes: a confirmation for the order with toppings.
*For Sending Card Response
- Let’s create an intent add some traning phrases for sending card response.
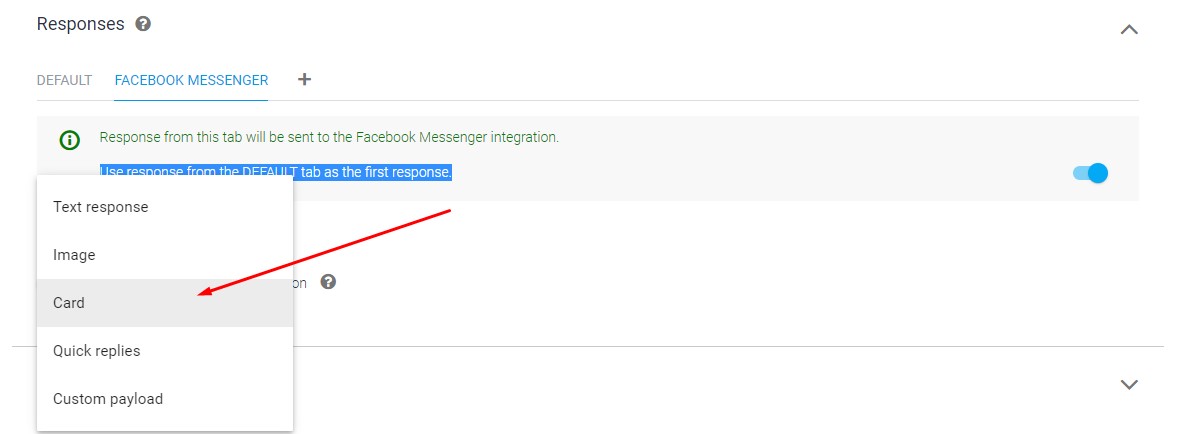
- Now in Responses Tab click on the Plus(+) button beside the Default and select “Facebook Messenger”. This is because the rich messeging does not support in default response in dialogflow
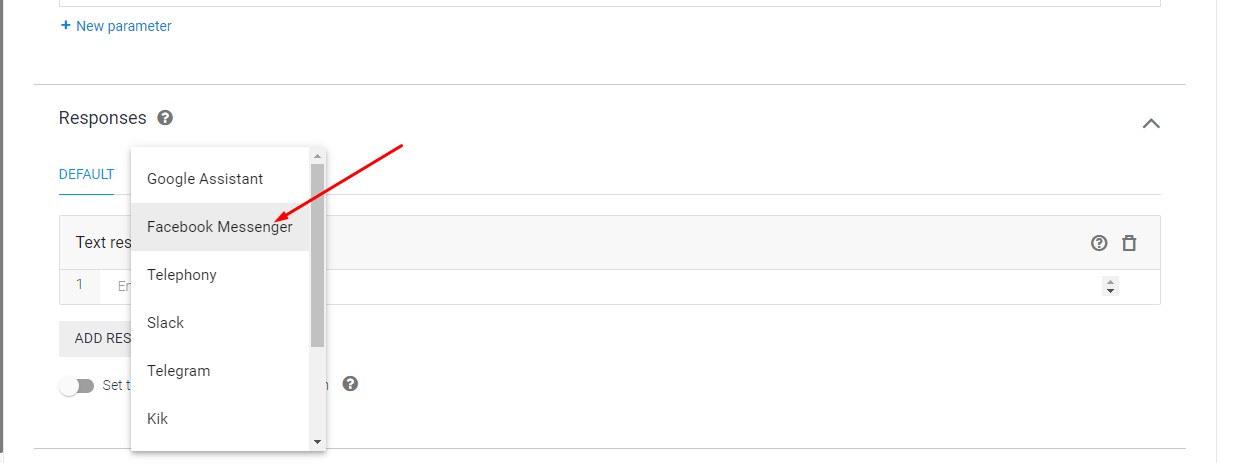
- After selecting Facebook Messenger please turn off the “Use response from the DEFAULT tab as the first response.”
- Now click on the Add Response button and select Card.
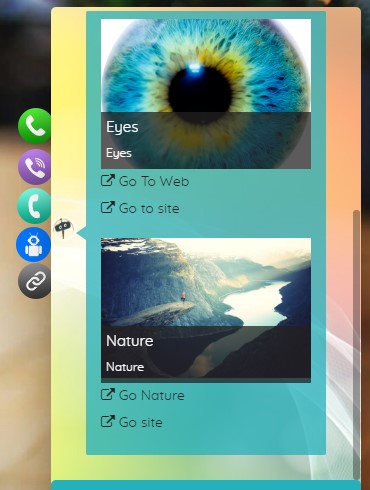
After clicking on the card you can able to provide information about card. You can add card as many as you need by clicking on the Add Responses button. After providing all information it will look like the below screenshot. After you have done with card then save the intent.
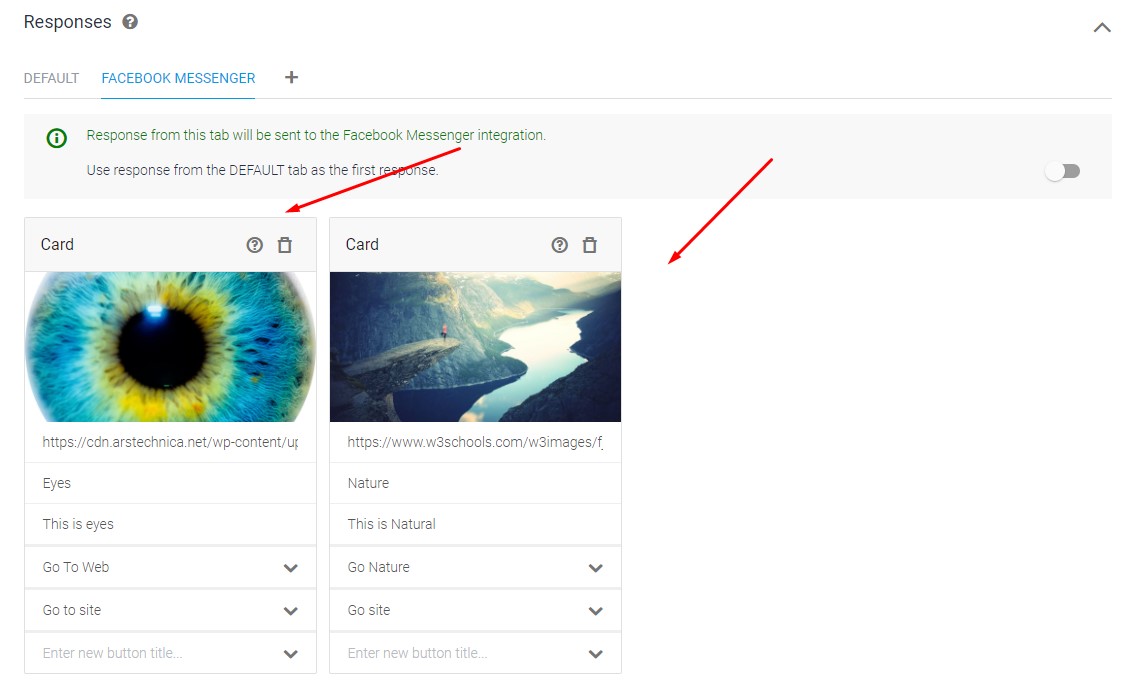
Then the card will display like the below screenshot