This guide explains how to create your own AI Agent using OpenAI Agent Builder, how to get the Workflow ID, and how to call it from your app or WordPress plugin.
1. Open the Agent Builder
Go to:
👉 https://platform.openai.com/agent-builder/create
If asked, log in with your OpenAI account.
2. Create a New Agent
-
Click Create New Agent
-
Give your agent a name
-
Add your instructions
(example: “You are a helpful WordPress assistant.”) -
Choose your model
Recommended:gpt-4.1,gpt-4o, orgpt-4o-mini -
Click Next
3. Add a Workflow
-
In the left sidebar, open Workflows
-
Click Create Workflow
-
Add steps based on what you want your agent to do:
-
Text response
-
Structured output
-
API call
-
Web search
-
File processing
-
Function calls
-
-
Save your workflow
4. Get Your Workflow ID
When you open the workflow, you will see a URL like:
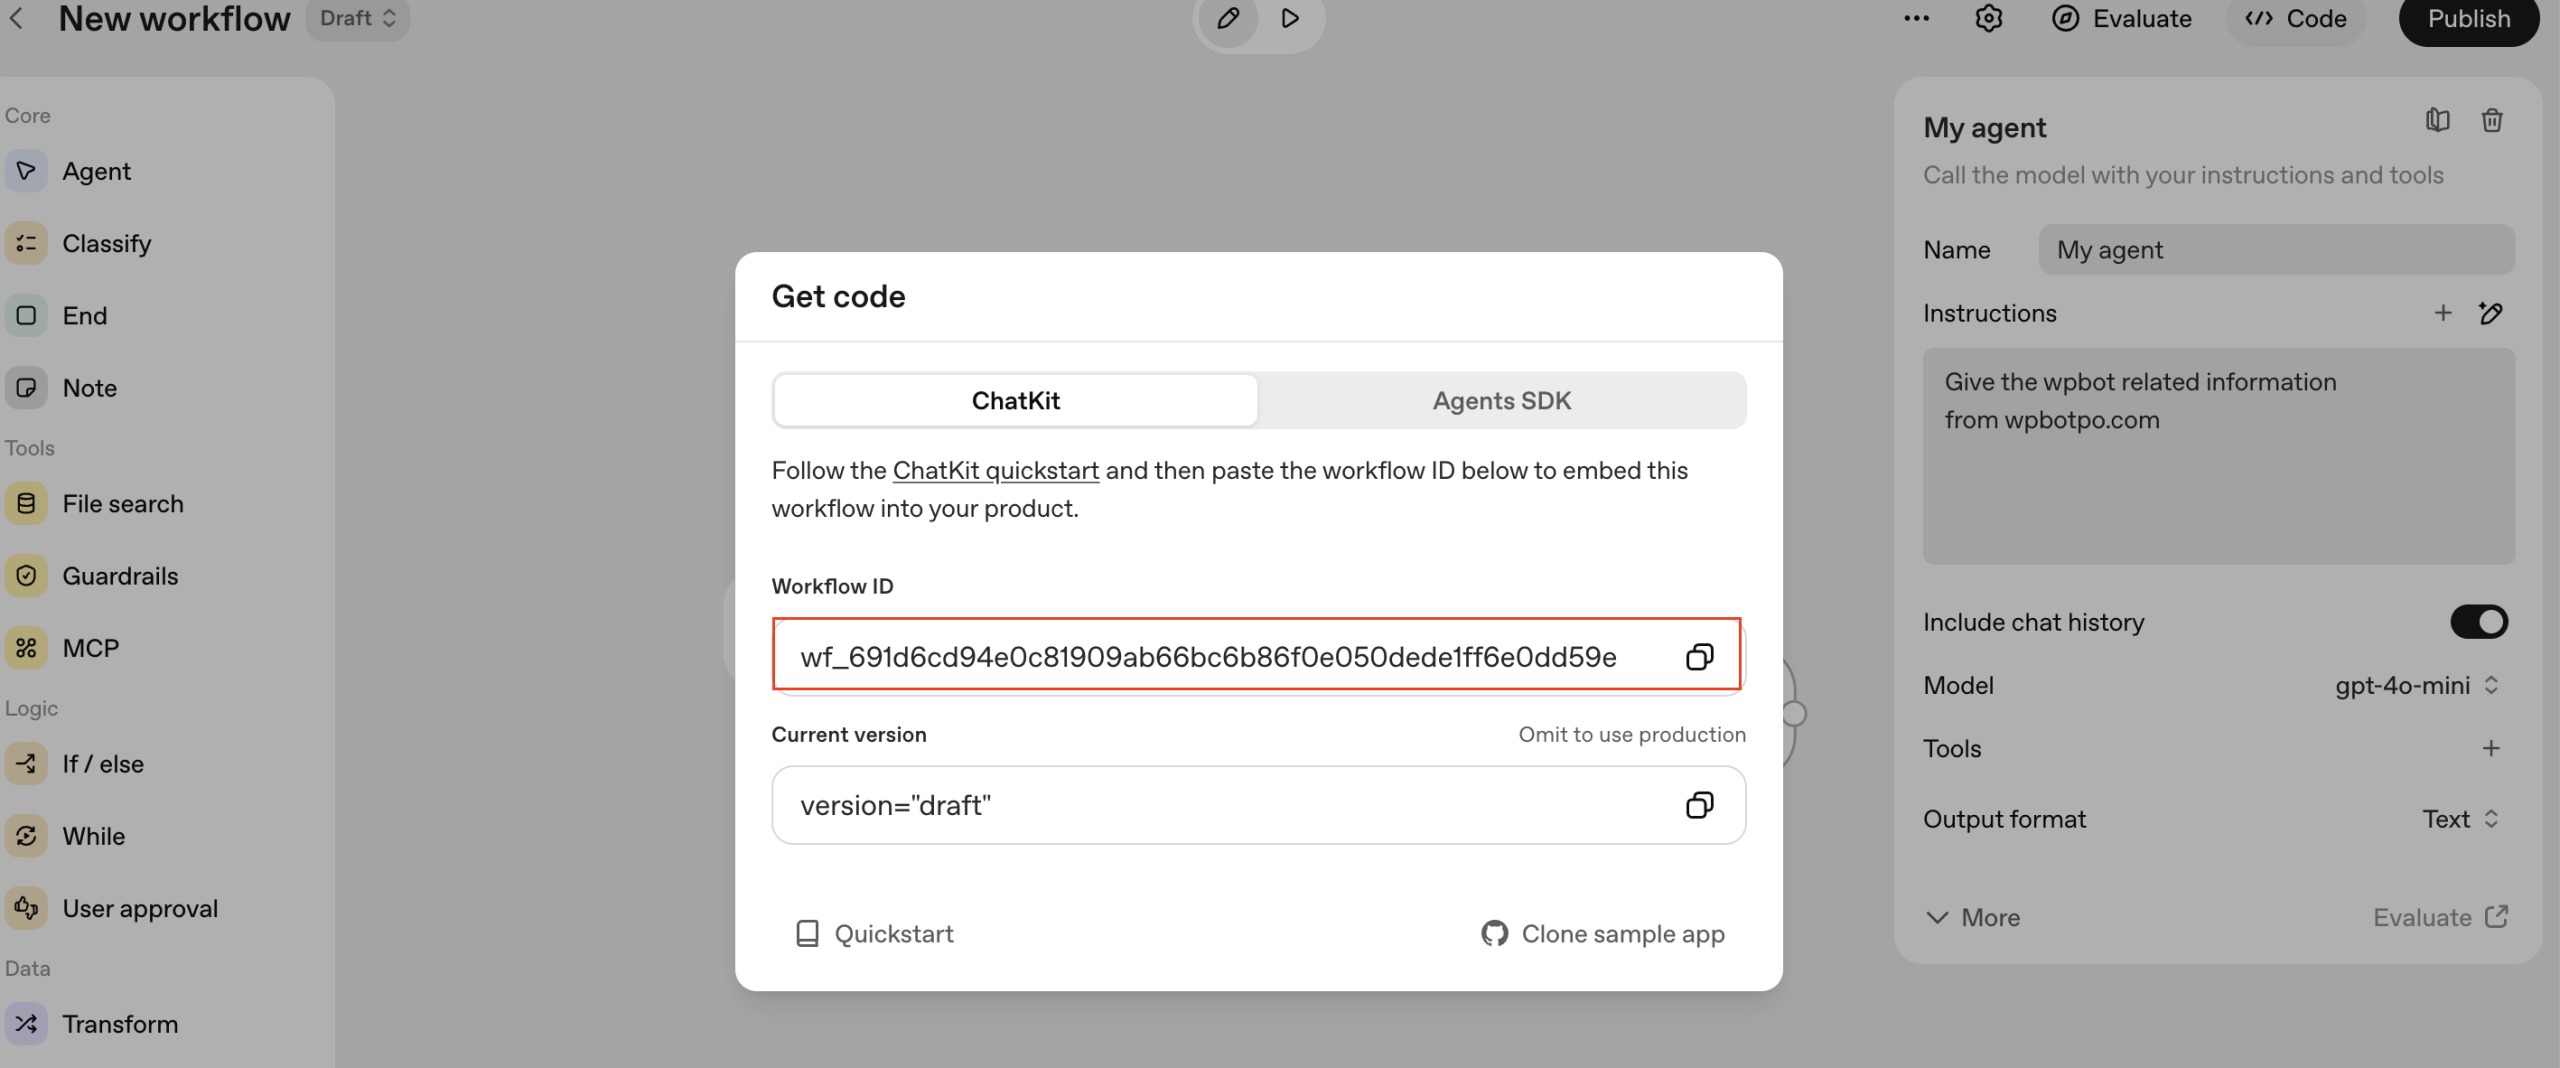
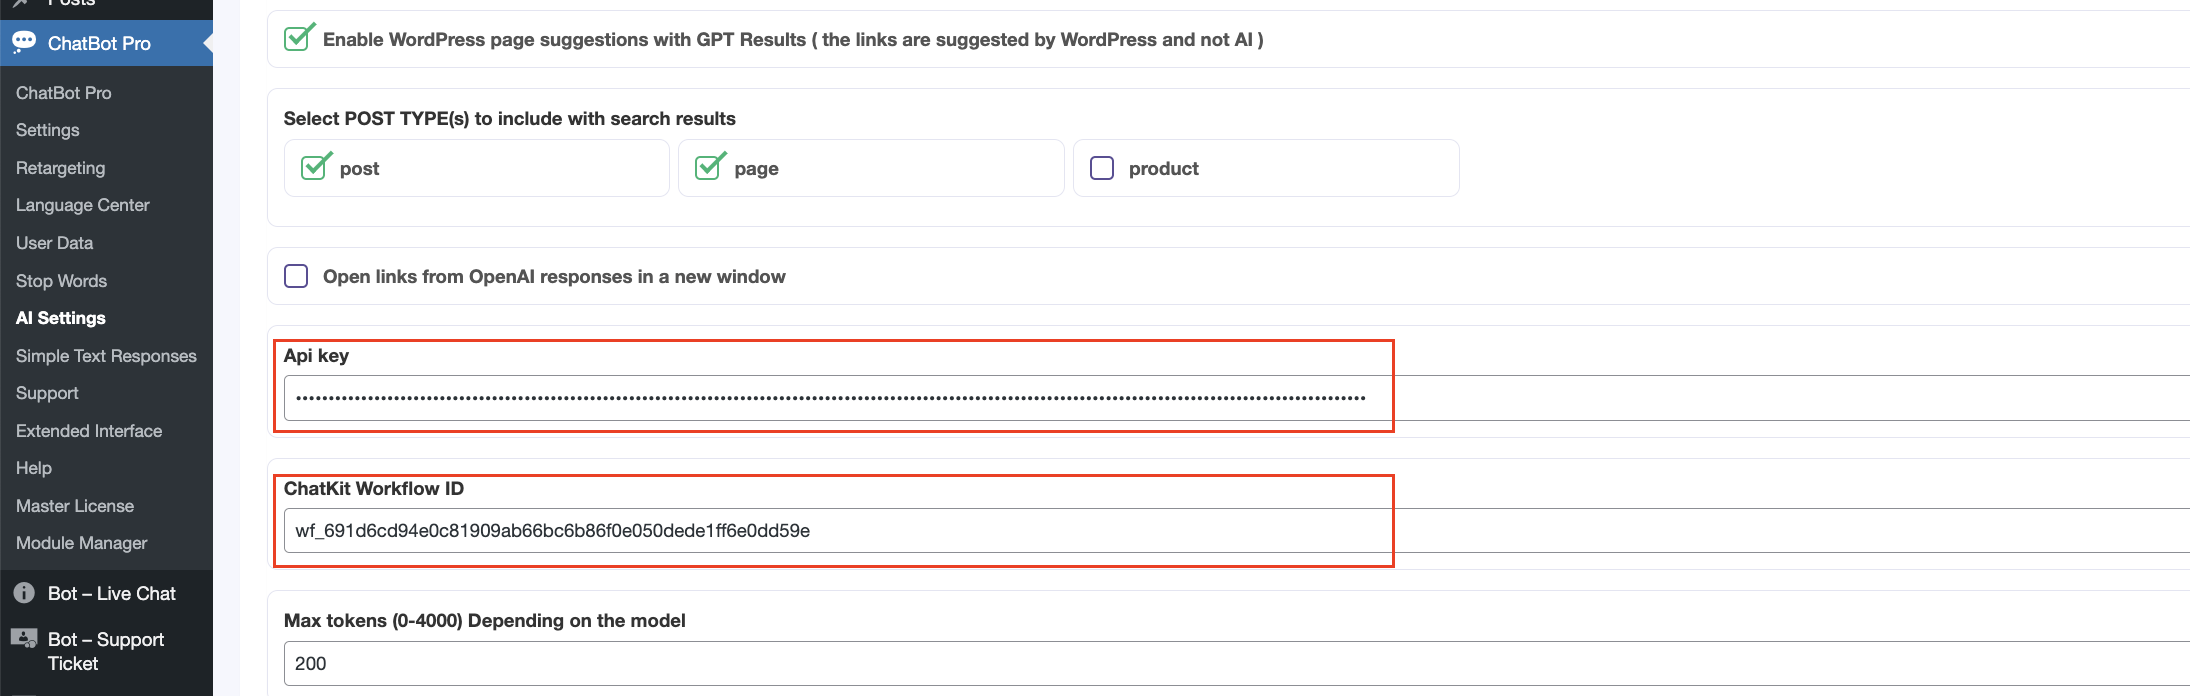
Note: Make sure OpenAI api key and workflow ID are from the same project
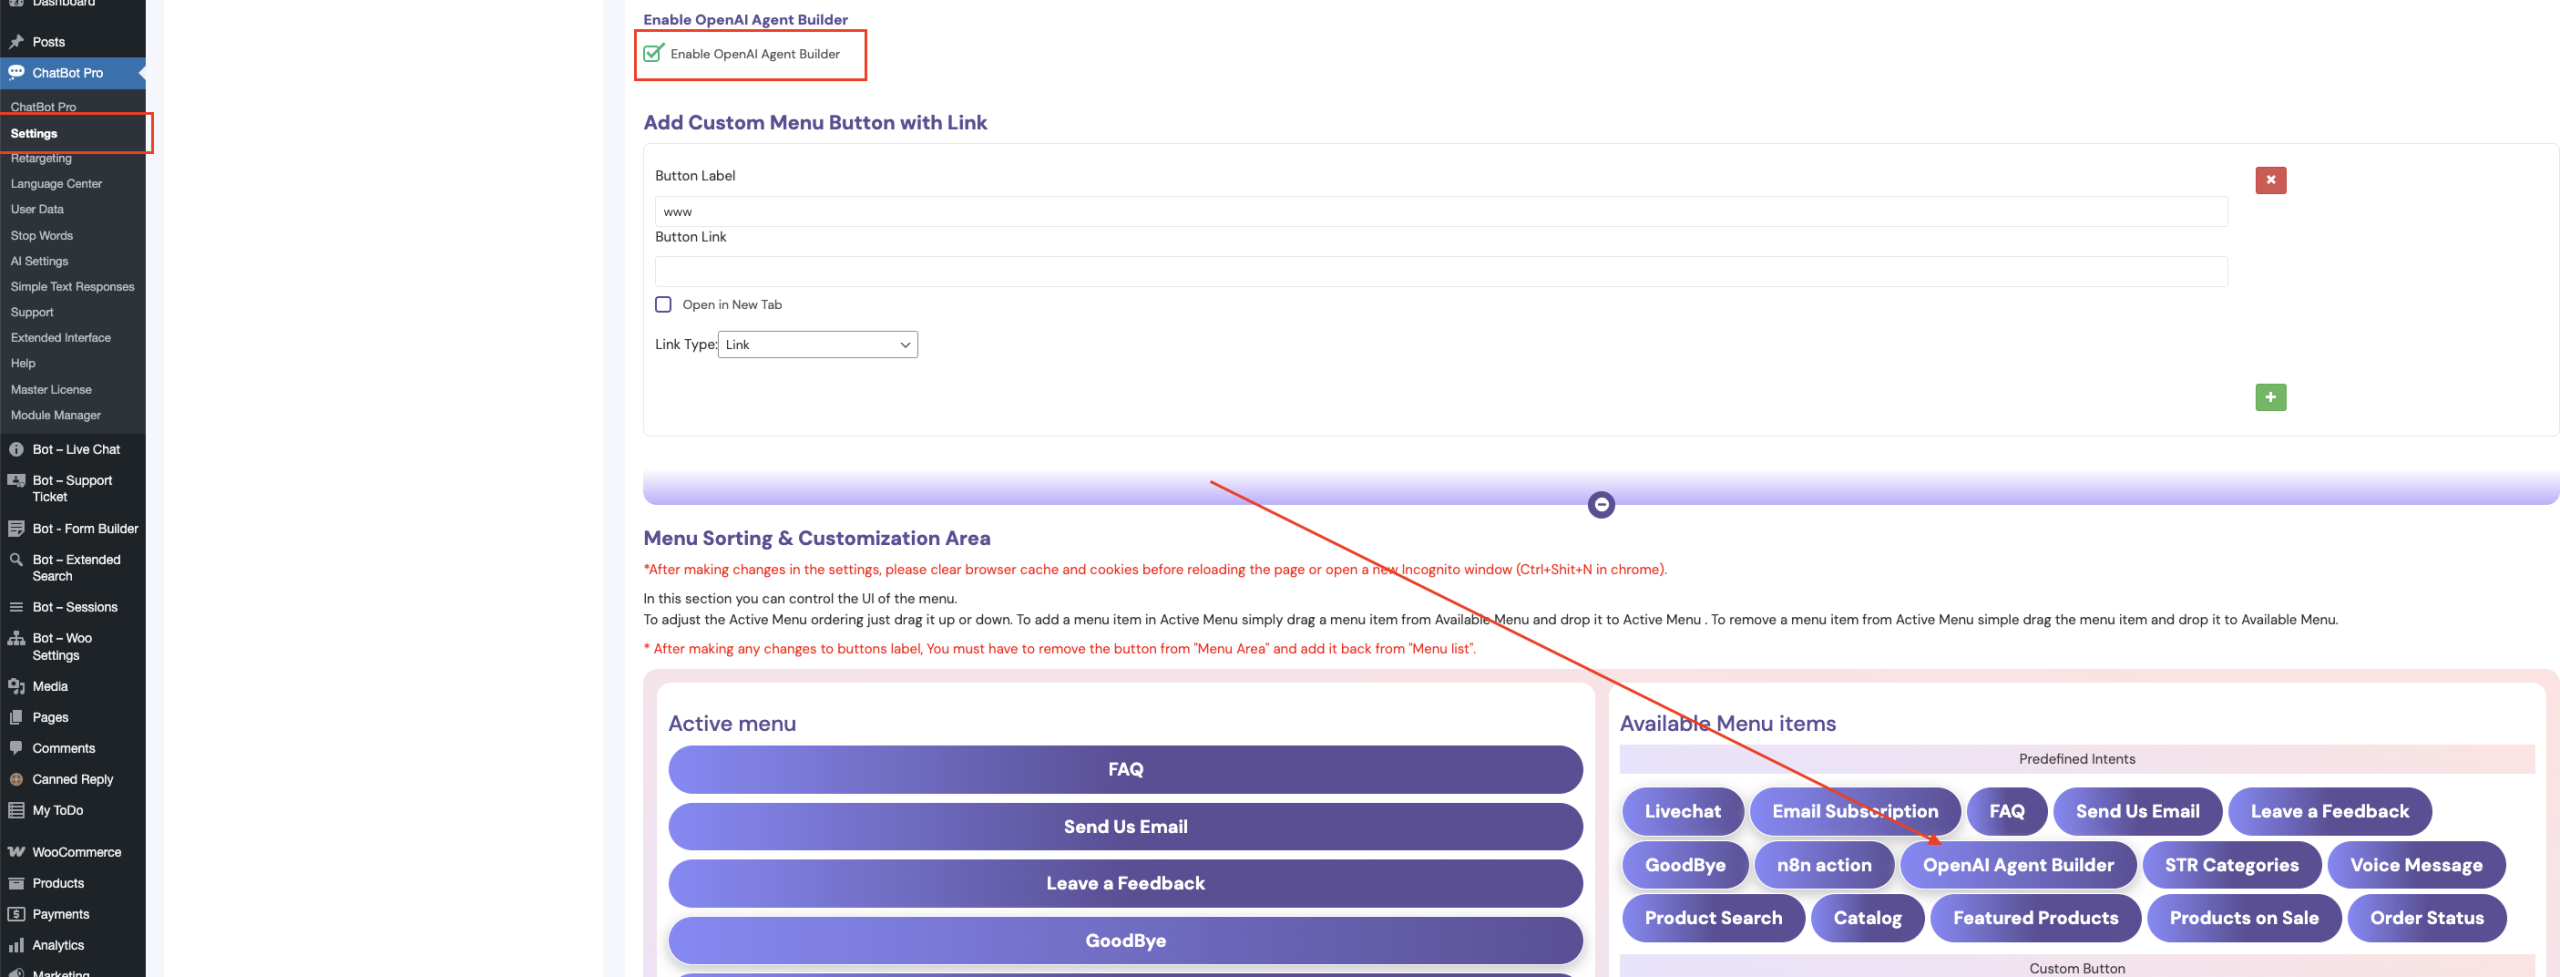
Now, when a user clicks on the Agen from the WPBot Start menu, a modal will open by the main chatbot window and render the OpenAI agent.