Table of Contents
By combining WPForms with MailRefine email verification and native Filters inside WPBot Automator Pro, you can prevent fake, disposable, or mistyped emails from ever reaching your spreadsheets.
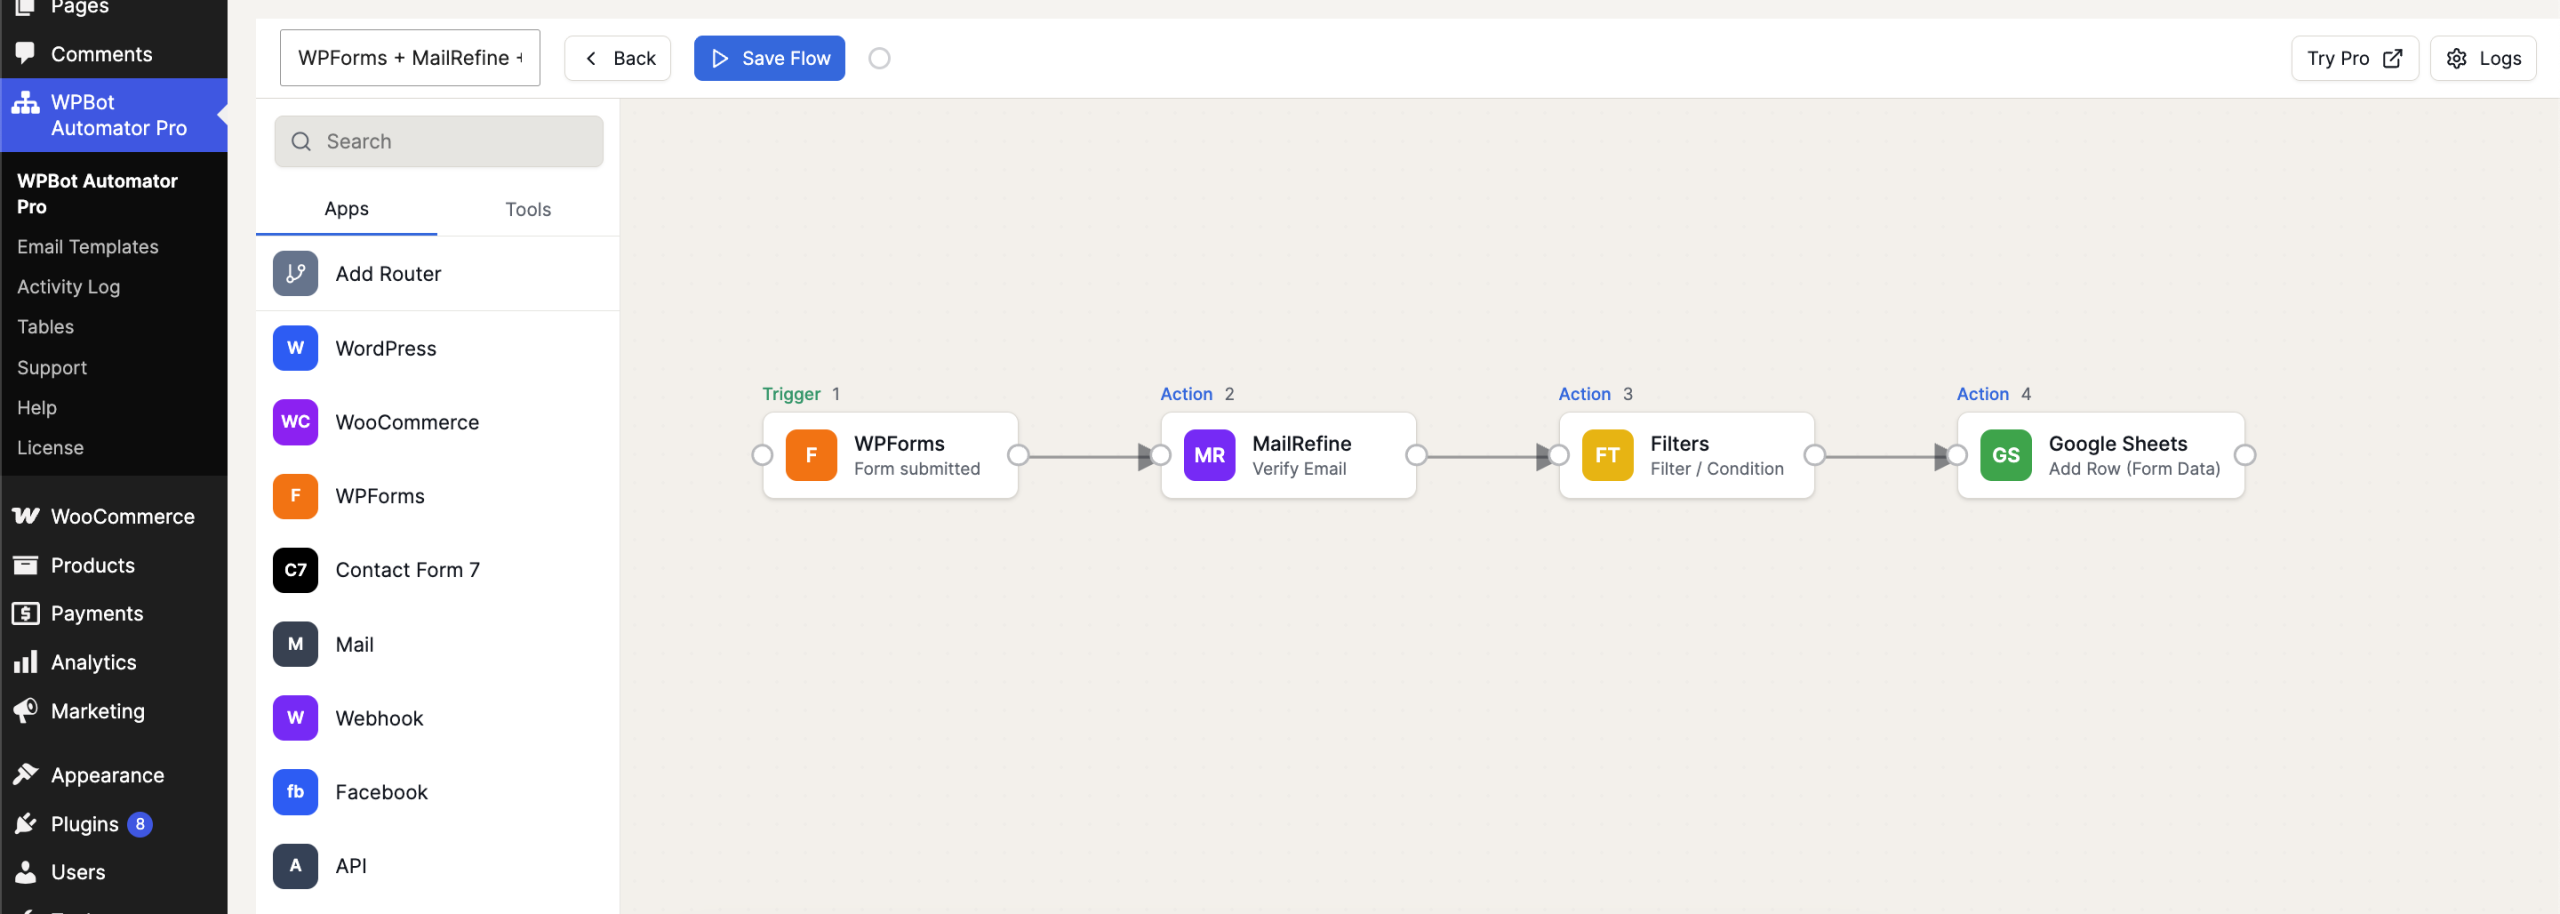
Our workflow follows a strict, step-by-step logic structure across four blocks:
-
Trigger 1: A user fills out a form via WPForms.
-
Action 2: The email address is instantly routed to MailRefine for verification.
-
Action 3: A Filter / Condition block checks the verification results.
-
Action 4: Only clean, verified data is sent forward to Google Sheets.
Step 1: Set the WPForms Trigger (Trigger 1)
First, configure the automation to listen for new form entries:
-
In your canvas flow builder, select WPForms from the left-hand Apps side menu.
-
Choose the Form submitted event block.
-
In the block configuration settings, choose the specific form you want to monitor from your site. This registers as Trigger 1.
Step 2: Route Data to MailRefine for Verification (Action 2)
Next, hook up your trigger data directly to your email verification service:
-
Drag a connector line from the output node of your WPForms block to a new action node.
-
Select MailRefine from the app panel and choose the Verify Email action.
-
Map the email field from your form submission into the input settings. This registers as Action 2.
Step 3: Insert the Verification Filter (Action 3)
To ensure bad emails are blocked from proceeding down the line, we use a dedicated logic guard:
-
Drag a connector line from MailRefine into a new block, selecting Filters under your tools panel.
-
Set the event action to Filter / Condition.
-
Configure your conditional rules: Set the logic parameters based on the output payload from Step 2:
-
IF:
MailRefine Status➡️ Equals ➡️valid
-
-
If a lead uses a fake or disposable address, the filter halts the process right here. This registers as Action 3.
Step 4: Send Validated Data to Google Sheets (Action 4)
The final stage securely saves your pristine leads:
-
Drag a connector line from the output node of your Filters block to your final action slot.
-
Select Google Sheets and choose the Add Row (Form Data) action.
-
Link your Google account, select your spreadsheet, and map your core lead fields (e.g., Name, Form ID, and Verified Email) to your matching columns. This completes the line as Action 4.