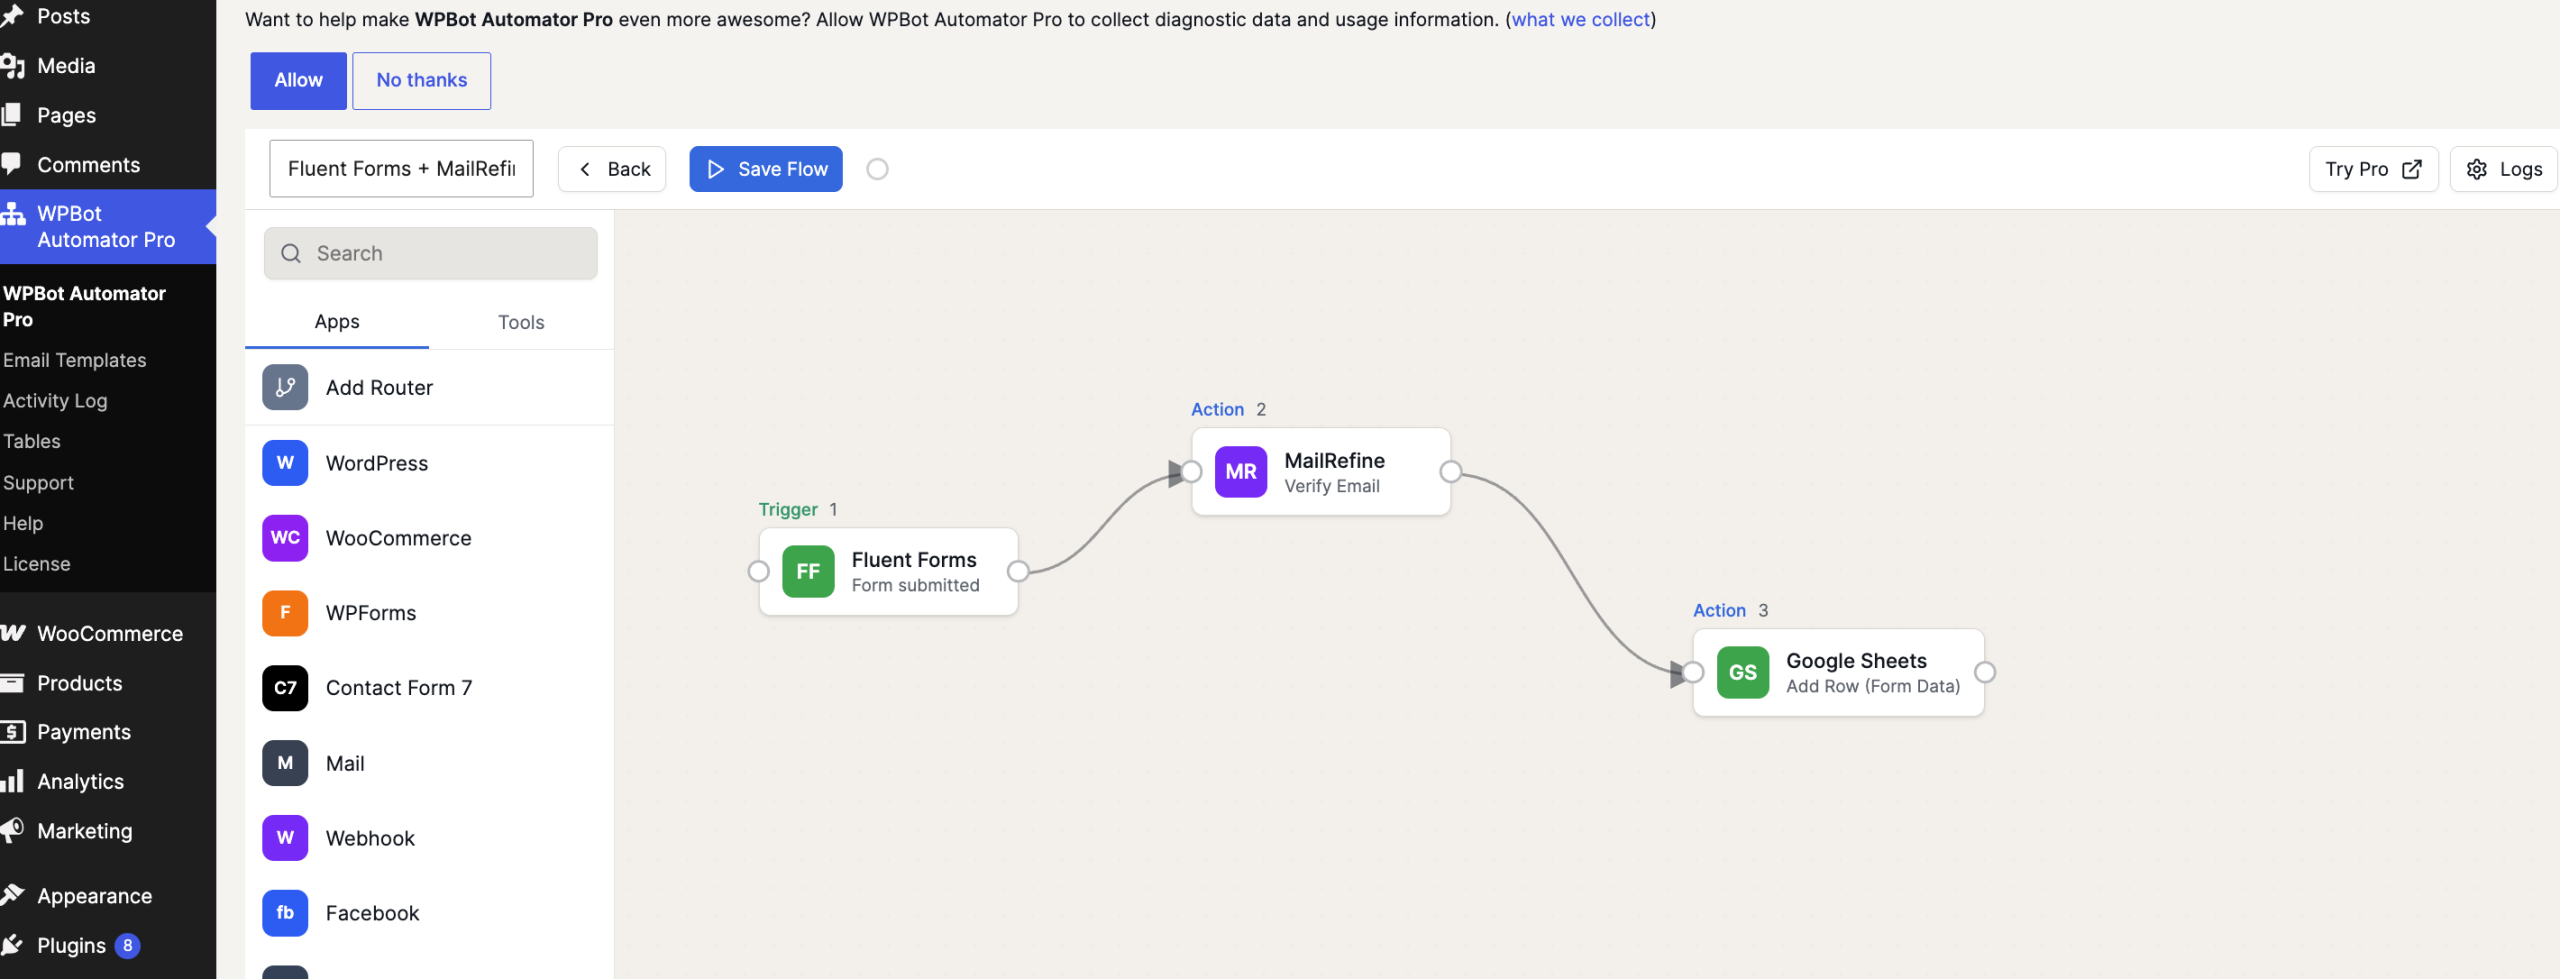
Fluent Forms with MailRefine email verification inside WPBot Automator Pro, you can screen out fake or mistyped email addresses instantly and pass only verified data directly to Google Sheets.
Step 1: Set Your Fluent Forms Trigger
-
Inside your WordPress dashboard, navigate to WPBot Automator Pro and click Create New Workflow.
-
Set your workflow Trigger to Fluent Forms.
-
Select the specific form you want to monitor (e.g., “Contact Us” or “Lead Magnet Form”).
-
Save the trigger to capture form variables like
{{form.email}}and{{form.name}}.
Step 2: Add MailRefine Verification (Action 1)
Instead of immediately mapping your form to a sheet, we introduce the MailRefine step to act as a bouncer.
-
Add an Action directly underneath your Fluent Forms trigger.
-
Select MailRefine (or choose Webhook/API Request if using MailRefine’s direct API key endpoints).
-
Set the action event to Verify Email.
-
Map your Fluent Forms email field variable (
{{form.email}}) into MailRefine’s request box.
Step 3: Insert Conditional Logic (The Filter)
To stop bad emails from proceeding down the timeline, add a conditional block.
-
Click the
+icon to add a rule block between your actions. -
Choose Conditional Logic / Router.
-
Set the condition parameters based on MailRefine’s output data payload:
-
IF:
MailRefine Status➡️ Equals ➡️valid
-
Now, if MailRefine flags the address as “disposable,” “spam,” or “invalid,” the automation halts immediately.
Step 4: Map Verified Data to Google Sheets (Action 2)
-
Inside the approved “Valid” path of your conditional logic, add your final Action.
-
Select Google Sheets from the integrations array.
-
Choose your target Spreadsheet and specific Worksheet tab.
-
Map your final column values:
-
Name Column:
{{form.name}} -
Email Column:
{{form.email}} -
Verification Status:
{{mailrefine.status}}(Optional: Useful if you want confirmation)
-
-
Save the configuration and toggle your workflow status to Active.