Follow these steps to configure your settings:
1. Access the Rate Limit Settings
Navigate to your WordPress Dashboard and follow this path:
ChatBot Pro → AI Settings → Common AI Settings → GPT Rate Limit
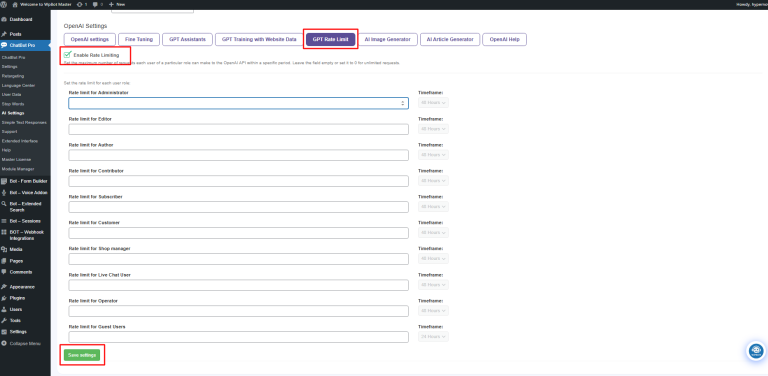
2. Enable the Feature
At the top of the section, locate the Enable Rate Limiting checkbox.
Important: You must check this box for any of the limits below to take effect.
3. Configure Role-Based Restrictions
You can define exactly how many AI queries each user type can perform. Each role features two specific controls:
• Rate Limit: Enter the maximum number of requests allowed. (Leave as 0 or empty for unlimited access).
• Timeframe: Choose the duration (e.g., 24 or 48 hours) before the limit resets.
Recommended Configuration Example:
User Role Rate Limit Timeframe
Administrator 0 (Unlimited) 48 Hours
|
User Role |
Rate Limit |
Timeframe |
|
Administrator |
0 (Unlimited) |
48 Hours |
|
Editor |
100 |
48 Hours |
|
Author |
50 |
48 Hours |
|
Subscriber |
20 |
48 Hours |
|
Customer |
15 |
48 Hours |
|
Guest User |
10 |
24 Hours |
4. Commit Your Changes
After tailoring the limits to your needs, scroll to the bottom of the page and click the Save Settings button. Your new token-saving rules are now live!